Table of Contents
Hey there, fellow crafters! Thanksgiving is just around the corner, and what better way to get into the spirit than with some awesome diy thanksgiving crafts for kids? Forget the store-bought decorations this year; let's get our hands messy and create some unforgettable memories. This article is your go-to guide for turning ordinary household items into fantastic Thanksgiving masterpieces. We're talking about transforming paper plates into turkeys, leaves into works of art, and even your own handprints into adorable keepsakes. Get ready to dive into a world of fun, easy, and super creative projects that will not only keep the little ones entertained but also add a special homemade touch to your holiday celebrations. From simple crafts for toddlers to more intricate projects for older kids, we've got something for everyone. So, grab your scissors, glue, and a dash of imagination, and let's make this Thanksgiving the most crafty one yet!
Easy DIY Thanksgiving Crafts for Little Hands
Easy DIY Thanksgiving Crafts for Little Hands
Paper Plate Turkeys
Let's start with something super simple: paper plate turkeys! These are perfect for tiny hands that are still learning the ropes. Grab some paper plates (the cheap kind works great), paint, and some construction paper. Let the little ones go wild with the paint – brown, orange, yellow, it's all good! Once the paint dries, cut out some triangle beaks and feather shapes from the construction paper. Glue 'em on, add some googly eyes, and voila! You've got a flock of adorable turkeys ready to gobble up some fun. It’s a craft that's all about freedom and not perfection, which, let's be honest, is exactly what toddlers need.
Don't have paint? No problem! Crayons and markers work just as well. You can also use stickers or even ripped-up bits of colorful paper to add to the turkey's plumage. The goal here is to get those little fingers engaged and let their creativity flow. It’s amazing how something so simple can bring so much joy and a sense of accomplishment to a little kid's face.
Handprint Fall Trees
Next up, let's make some handprint fall trees. This one is a classic for a reason – it’s cute, personal, and super easy. You'll need some large paper, brown paint, and fall-colored paints (red, yellow, orange). Paint your kid's hand brown and press it onto the paper to create the tree trunk and branches. Then, let them use their fingers or a sponge to dab on the fall colors around the branches, creating the leaves. Each tree will be unique, just like the little artists who made them. It’s a great way to capture a moment in time and see how those tiny hands grow year after year.
To make the craft even more engaging, you can take it outside and gather some real leaves. Use those leaves as stamps by painting them and pressing them onto the paper. This adds a fun sensory element to the craft and teaches kids about the different shapes and textures of fall leaves. It's also a fun excuse to get some fresh air and maybe even jump in a pile of leaves (after the crafting, of course!).
Crafting Materials Checklist
Craft | Materials |
|---|---|
Paper Plate Turkeys | Paper plates, paint, construction paper, glue, googly eyes |
Handprint Fall Trees | Large paper, brown paint, fall-colored paints, optional real leaves |
Leaf Rubbings
Finally, let’s talk about leaf rubbings, a fantastic way to combine art and nature. All you need are some fallen leaves, paper, and crayons. Place a leaf under a piece of paper and then rub the side of a crayon over the paper. The leaf's texture will magically appear on the paper! This craft is so simple, yet it never fails to amaze. It’s like a little bit of nature's magic right there on the page. Plus, it's a fantastic way to discuss different types of leaves and their unique patterns.
You can also turn these leaf rubbings into other crafts. Cut them out and glue them onto a larger piece of paper to create a fall collage, or use them to decorate homemade Thanksgiving cards. The possibilities are endless! Remember, these crafts are all about having fun and making memories. Don’t worry about perfection; just let the kids explore and enjoy the process. That’s the real magic of crafting with little ones.
TurkeyThemed DIY Thanksgiving Crafts
TurkeyThemed DIY Thanksgiving Crafts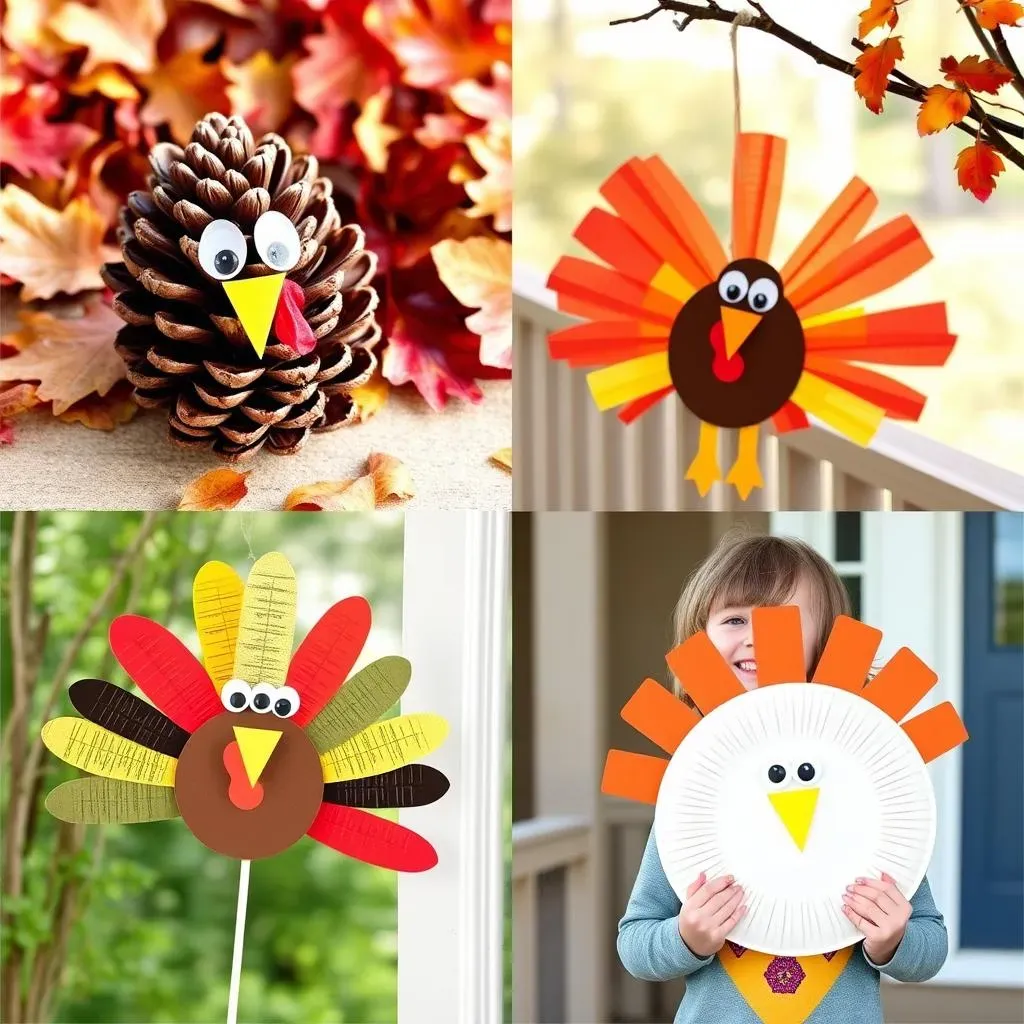
Pinecone Turkeys
Alright, let’s talk turkeys! But not the kind you eat – the kind you craft! Pinecone turkeys are a fantastic way to bring a bit of nature indoors. Grab some pinecones from your backyard or a local park. You'll also need some felt, googly eyes, and glue. Cut out some feather shapes from the felt – think bright colors like red, orange, and yellow. Glue these to the back of the pinecone to create a fan of feathers. Then, add some googly eyes and a small triangle of orange felt for the beak. These little guys are not only adorable but also super easy for kids of all ages to make. It’s like giving a little forest creature a Thanksgiving makeover.
If you want to get extra fancy, you can use glitter glue to add a bit of sparkle to the feathers or even paint the pinecones with brown paint before adding the felt. The beauty of this craft is that each turkey will look slightly different, depending on the shape of the pinecone and the colors of felt used. It's a great way to encourage kids to appreciate the uniqueness of natural materials and to see how simple items can be transformed into something fun and festive.
Turkey Windsocks
Okay, now let's make something that moves! Turkey windsocks are a blast, and they're perfect for decorating your porch or classroom. You'll need a paper bag, some construction paper, glue, and string. First, cut strips of colorful construction paper to make the turkey's feathers. Glue these strips to the bottom of the paper bag. Then, cut out a turkey head from brown construction paper and glue it to the top of the bag. Don't forget to add googly eyes and a beak! Finally, punch a couple of holes at the top of the bag and thread some string through so you can hang it up. When the wind catches it, the turkey will dance and twirl, bringing a bit of whimsy to your Thanksgiving decor.
To make your windsocks even more durable, you can use a plastic bag instead of a paper bag. You can also add extra embellishments like glitter, stickers, or even small bells to make them even more festive. This craft is not only fun to make but also a great way to teach kids about wind and how it moves things. Plus, it’s a craft that they can proudly display and watch come to life with a simple breeze.
Turkey Craft Supply List
Craft | Materials |
|---|---|
Pinecone Turkeys | Pinecones, felt, googly eyes, glue |
Turkey Windsocks | Paper bag, construction paper, glue, string |
Paper Plate Turkey Masks
Time to get a little silly! Let's make some paper plate turkey masks. It’s like a mini costume party right in your living room. Grab some paper plates, elastic string, paint, construction paper, and glue. Cut out eye holes in the paper plates, and let the kids decorate them with brown and orange paint. Once the paint dries, add construction paper feathers, a beak, and googly eyes. Finally, attach the elastic string to the sides of the plate so it can be worn as a mask. Now, your little turkeys can strut around and gobble to their heart’s content. It's a fantastic way to encourage imaginative play, and let's face it, who doesn't love a good dress-up session?
For an extra touch, you could add some silly features like a red wattle made out of felt or even a tiny hat on top of the turkey’s head. This craft is all about having fun and embracing the silliness of the season. It’s a great way to get kids excited about Thanksgiving and to encourage them to express their creativity through play. Plus, these masks are perfect for some hilarious family photos that you'll treasure for years to come.
Creative DIY Thanksgiving Crafts for the Whole Family
Creative DIY Thanksgiving Crafts for the Whole Family
Gratitude Tree
Okay, let's move on to something that's not just crafty but also heart-warming: a gratitude tree! This is a project that involves everyone in the family and encourages a bit of reflection. You'll need a large branch (or a drawing of a tree), some colorful paper, and string or ribbon. Cut the paper into leaf shapes and have each family member write down something they’re grateful for on each leaf. Then, tie the leaves to the branch, creating a beautiful and meaningful display. It’s a great way to share what matters most to each of you and to fill your home with positive vibes. Plus, it looks pretty darn cool, too!
To make the activity even more engaging, you can turn it into a nightly ritual during the week leading up to Thanksgiving. Each evening, gather around the tree and have everyone share what they wrote on their leaf. This fosters a sense of connection and allows everyone to appreciate the good things in their lives. It’s a simple yet powerful way to cultivate gratitude and to remind ourselves what Thanksgiving is truly about. Don't be surprised if this becomes a cherished family tradition that you look forward to year after year.
Thankful Jar
Next, let's make a thankful jar. It's super easy and a great way to keep those grateful thoughts going all year long. You'll need a jar, some paper, and pens. Decorate the jar however you like – maybe add some paint, ribbon, or stickers. Then, cut the paper into small strips and have everyone write down what they’re thankful for on each strip. Fold the strips and put them in the jar. You can read these aloud on Thanksgiving Day, or keep adding to it throughout the year and read them on the next Thanksgiving. It’s like a little time capsule of gratitude that you can revisit whenever you need a dose of positivity.
To make this craft even more personal, you can use different colored paper to represent different categories of gratitude, like family, friends, or experiences. You can also encourage everyone to illustrate their thankful notes with simple drawings. The beauty of this craft is that it’s ongoing and can grow as your family grows. It’s a simple way to keep the spirit of thankfulness alive all year round and to create a visual reminder of all the good things in your lives.
Family Craft Materials
Craft | Materials |
|---|---|
Gratitude Tree | Branch or tree drawing, paper, string or ribbon |
Thankful Jar | Jar, paper, pens, optional decorations |
Family Handprint Tablecloth
Alright, let’s get a bit messy again! How about creating a family handprint tablecloth? It’s a fun and lasting way to remember this Thanksgiving. You’ll need a plain fabric tablecloth and fabric paints. Have each family member dip their hand in paint and press it onto the tablecloth. You can use different colors for each person or even mix colors to create unique patterns. Once the paint dries, you can add names or dates to make it even more special. This tablecloth will be more than just a covering for your table; it’ll be a treasured keepsake that you can use for years to come.
To make it even more personalized, you can add decorations around the handprints, like small drawings or written messages. You can also make it a tradition to add handprints to the tablecloth each year, creating a visual timeline of your family’s growth. It’s a great way to include everyone and to create a lasting memory that you can enjoy together every Thanksgiving. It's also a fantastic conversation starter when you have guests over. "Oh, that's my tiny handprint from when I was ten!"
DIY Thanksgiving Crafts That Teach and Delight
DIY Thanksgiving Crafts That Teach and Delight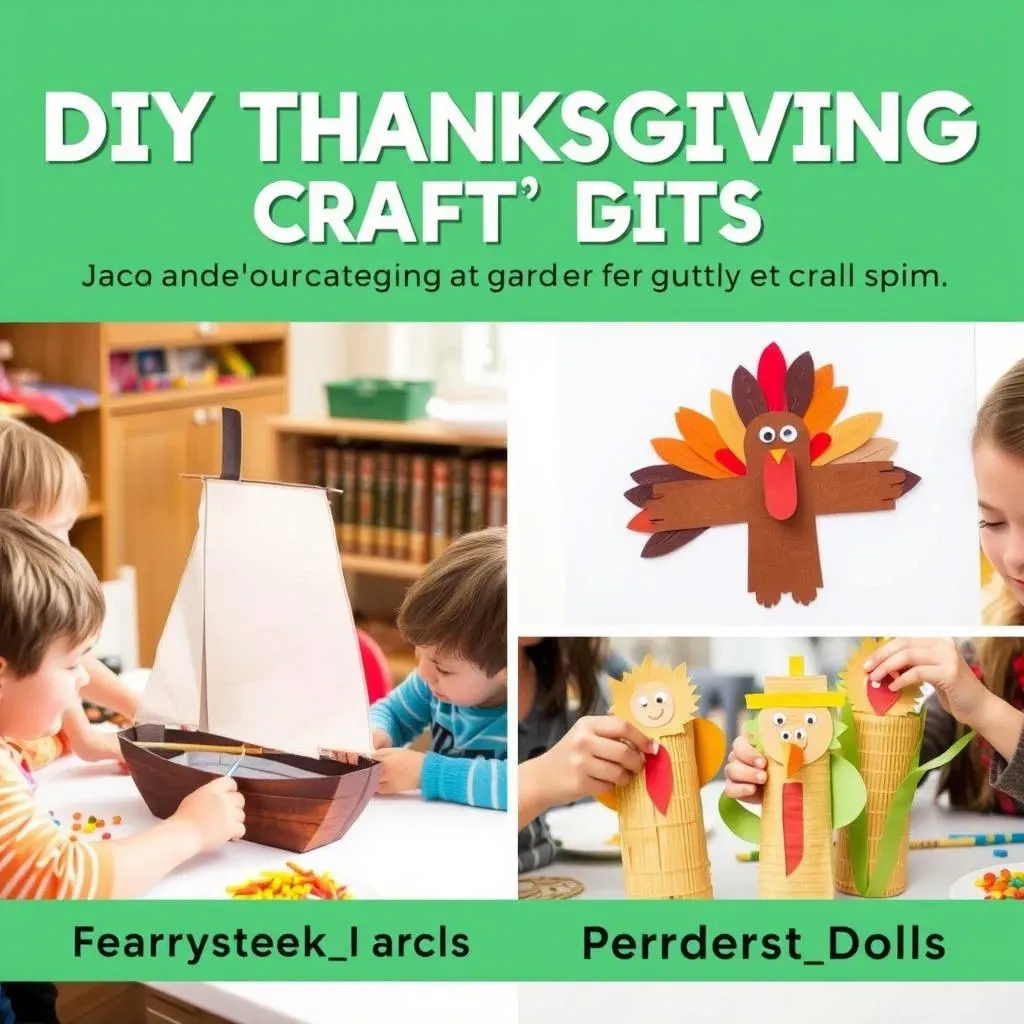
Mayflower Boat Craft
Alright, let’s get a little historical with our crafting! The Mayflower boat craft is a fantastic way to introduce kids to the story of Thanksgiving. You'll need some cardboard, brown paint, paper, and glue. Cut out the shape of a boat from the cardboard and let the kids paint it brown. Then, use white paper to make the sails and glue them onto the boat. You can also add small details like paper flags or tiny paper passengers. This craft isn’t just fun; it’s also a great way to start a conversation about the pilgrims and their journey to America. It brings a bit of history to life, making it more engaging and memorable for the little ones.
To make the craft even more interactive, you can encourage the kids to create little characters out of paper or even use small toy figures to represent the pilgrims. You can also read a simple book about the Mayflower or watch a short video to help them understand the historical context. It’s a great way to combine learning with creativity and to help kids appreciate the significance of Thanksgiving beyond the feast. Plus, it's always fun to have a little boat to play with afterwards, even if it doesn't float!
Feather Letter Turkey Craft
Next up, let's make a feather letter turkey craft, which is a fun way to combine art with a little bit of alphabet practice! You'll need some construction paper, craft feathers, markers, and glue. Draw a simple turkey body on a piece of paper. Then, write a letter on each of the craft feathers. Have the kids glue the feathers to the turkey's body, creating a colorful and feathery display. You can use this craft to practice the alphabet, spell out names, or even write out words related to Thanksgiving. It's a fantastic way to sneak in a little bit of learning while having fun!
To make the craft even more engaging, you can turn it into a game. Call out a letter and have the kids find the corresponding feather and glue it on the turkey. Or, have them spell out simple words using the feathers. This craft is not only educational but also encourages kids to develop their fine motor skills and creativity. It’s a great way to show that learning can be fun and that even a simple craft can be a powerful tool for teaching. Plus, they get a cute turkey out of it!
Educational Craft Supplies
Craft | Materials |
|---|---|
Mayflower Boat | Cardboard, brown paint, paper, glue |
Feather Letter Turkey | Construction paper, craft feathers, markers, glue |
Corn Husk Dolls
Finally, let's try our hands at making corn husk dolls. This craft is not only fun but also a great way to connect with the traditions of the past. You'll need some dried corn husks, string or twine, and some simple craft supplies like markers or yarn. Soak the corn husks in water to make them pliable, then tie them together to form a simple doll shape. You can use markers to draw a face or use yarn to create hair. This craft is not only a fun way to explore different materials but also a great way to talk about the history of corn and its importance to Native American cultures. It’s a great way to appreciate the past while creating something beautiful and unique.
To make the activity even more engaging, you can read a book or watch a video about Native American traditions and learn more about how corn was used in their daily lives. You can also encourage the kids to create different outfits for their dolls using scraps of fabric or yarn. It’s a great way to spark curiosity, promote cultural awareness, and create a craft that’s both educational and fun. Plus, these dolls make wonderful keepsakes that kids can treasure for years to come. It's like making a little piece of history with your own hands.