Table of Contents
Halloween is just around the corner, and what better way to get into the spooky spirit than with some awesome halloween crafts for 6 year olds? Forget the store-bought decorations; we're diving into the world of DIY fun! This isn't just about keeping little hands busy; it’s about sparking creativity, making memories, and maybe even creating a few friendly monsters along the way. We'll start with some super easy crafts that even the littlest goblins can manage, think simple cuts and pastes with big, bold results. Then we'll move on to creating some spooky decorations that will make your house the coolest haunted spot on the block. And because crafting is always better with friends, we will share some games with a crafty twist that will keep the fun rolling. Finally, we will tie it all together with a step-by-step guide so even the most novice crafters can get in on the action. So, grab your glue sticks, gather your glitter, and let's get crafting!
Easy Halloween Crafts for Little Hands
Easy Halloween Crafts for Little Hands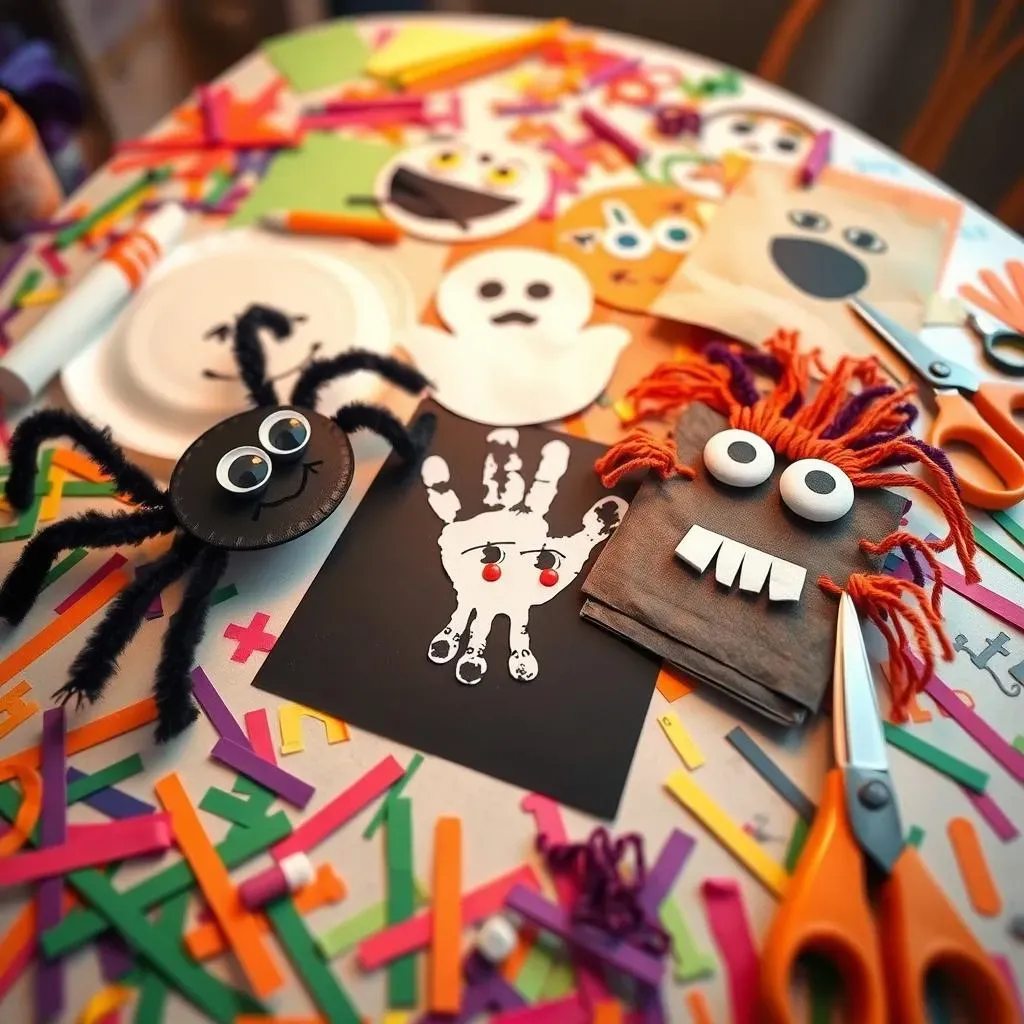
Okay, let's be real, six-year-olds are awesome, but their attention spans can be shorter than a goldfish's memory, so we need crafts that are quick, easy, and super engaging. I'm talking about projects that use simple supplies you probably already have lying around. Think construction paper, googly eyes (because, let's face it, everything is better with googly eyes), glue sticks, and maybe some crayons or markers. We're not trying to create masterpieces here; it's all about the process and the fun. We want to avoid complicated steps that will lead to frustration and tears. The goal is to make something cute and spooky without requiring a PhD in crafting. My personal favorite? Paper plate spiders! They are simple, fun, and you can make them as silly or as scary as you like.
Another fantastic idea is making handprint ghosts. Just paint your little one's hand white, press it on some black paper, and add some spooky eyes and a mouth. It’s a great way to capture their little handprints and create a keepsake. And speaking of paper, let’s not forget about paper bag puppets. Transform plain brown lunch bags into friendly monsters or silly jack-o'-lanterns. Kids can draw faces, add yarn hair, or glue on some paper cutouts. It's like a mini theatrical production, and they can put on shows for the whole family. These crafts aren’t just about making something; they are about building confidence and giving kids a sense of accomplishment. Plus, they are a great way to keep them entertained while you’re getting ready for the big Halloween night.
Craft | Materials | Why it's great |
|---|---|---|
Paper Plate Spiders | Paper plates, paint, googly eyes, pipe cleaners | Easy, fun, customizable |
Handprint Ghosts | Paint, paper, googly eyes, marker | Simple, keepsake, cute |
Paper Bag Puppets | Paper bags, markers, construction paper, glue | Creative, interactive, fun |
Spooky Halloween Decorations Kids Can Make
Spooky Halloween Decorations Kids Can Make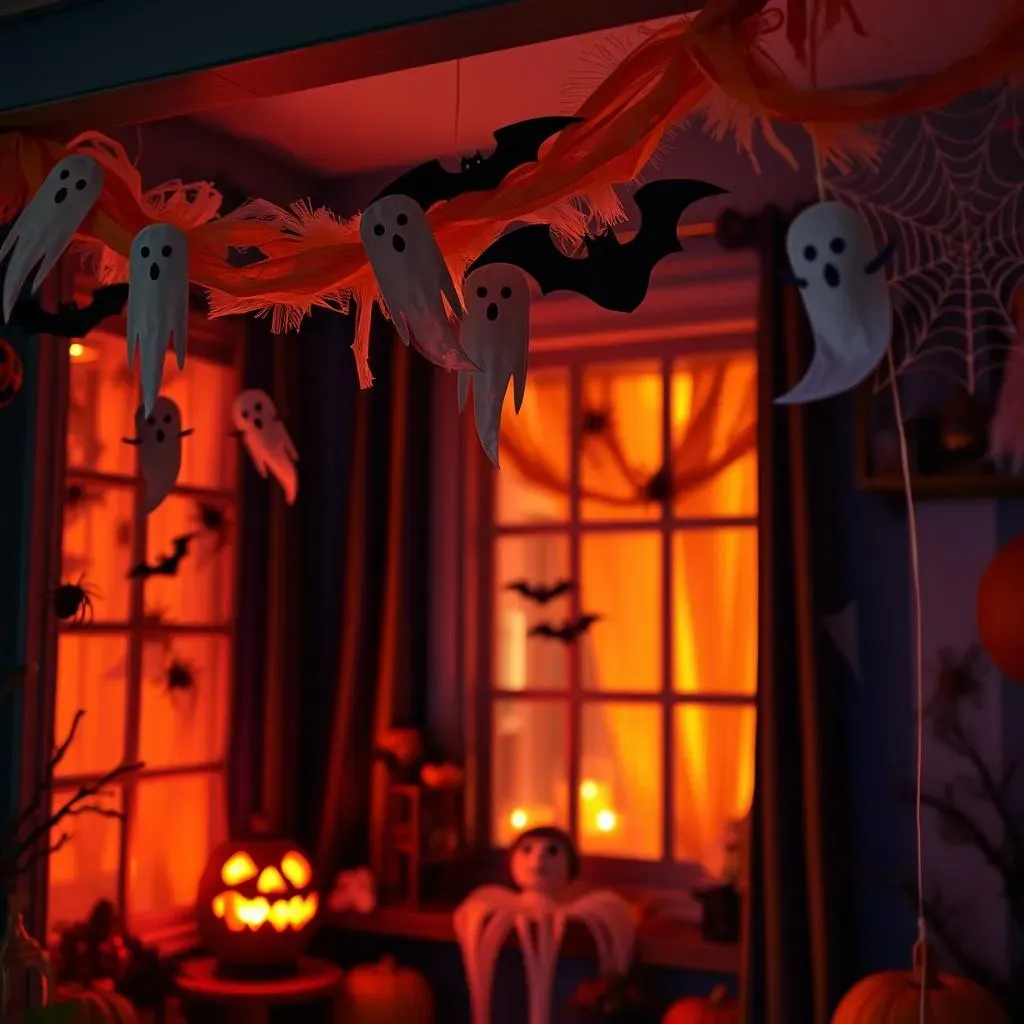
Get Your Spooky On
Alright, now that we've got some adorable crafts under our belt, let's amp up the spook factor! It's time to think decorations. Forget those flimsy plastic skeletons; we're making our own! I'm talking about decorations that are not only fun to make, but also add a special touch of homemade charm to your Halloween setup. This is where your 6-year-old can really show off their creative flair, and you get some cool decorations to boot. We’re aiming for decorations that are eye-catching and fun, without being too complicated for little hands. So, let's transform your home into a haunted haven with some kid-friendly spooky decor!
One super fun idea is making ghost garlands. Grab some white tissue paper, cut out some simple ghost shapes, and add googly eyes and a marker mouth. String them together with some yarn or string, and you've got a spooky garland that’s perfect for hanging on the walls or across the mantel. Another great option is creating paper plate bats. Paint paper plates black, cut out some bat wings from black construction paper, and glue them on. Add some googly eyes, and you've got adorable bats to hang from the ceiling. These decorations are super simple and really let kids get creative with their designs. I remember my nephew making a bat with mismatched eyes, it was hilarious and totally unique.
DIY Decor Ideas
Another thing we can create is spiderwebs out of paper plates! Cut out the center of the paper plates, then start snipping away to create a spiderweb pattern. You can add some little plastic spiders for extra creepiness. These are super easy and look fantastic hanging in windows or doorways. And if you are feeling extra creative, you can make some spooky window clings using clear contact paper and tissue paper. Cut out some shapes like pumpkins, ghosts, or bats from different colored tissue paper, stick them on the contact paper, and then stick it to your windows. The light shining through makes them look really cool, especially at night. These decorations are all about letting kids explore different materials and techniques, and most importantly, having fun while making your house look spooky!
Decoration | Materials | Why it's Spooky Fun |
|---|---|---|
Ghost Garlands | Tissue paper, googly eyes, yarn | Easy to make, great for hanging |
Paper Plate Bats | Paper plates, paint, construction paper, googly eyes | Simple, cute, adds charm |
Paper Plate Spiderwebs | Paper plates, scissors, plastic spiders | Easy, unique, adds texture |
Tissue Paper Window Clings | Contact paper, tissue paper, scissors | Colorful, fun, light shines through |
Let's Get Creative
These decorations are all about using simple materials in creative ways. It’s amazing how a few paper plates, some paint, and a little imagination can transform a room into a spooky wonderland. The best part? Kids feel super proud when they see their creations hanging up. It’s not just about decorating; it’s about making memories and having fun together. I really think that it makes Halloween more special when you have decorations that you made with your own hands. It is also very budget-friendly, and you can get your kids involved in the process of planning and creating these decorations. Plus, it's a great way to get them excited about the upcoming holiday. So, let’s get crafting and turn our homes into spooky, kid-friendly havens!
Fun Halloween Activities and Games with a Crafty Twist
Fun Halloween Activities and Games with a Crafty Twist
Crafty Costume Parade
Okay, so you’ve got all these amazing crafts, now what? Let's turn them into games! How about a costume parade with a crafty twist? Instead of just showing off store-bought costumes, kids can parade in outfits they've made themselves or with elements they've crafted. Maybe they made their own masks, or added some spooky flair to an old t-shirt. It's a chance for them to not only show off their creativity but also for you to admire their hard work. I remember one year, my niece made a cape out of painted paper plates, it was the highlight of the parade. The key is to celebrate the effort and creativity, not just the final product. Plus, it’s a great way to get them moving and burning off some of that Halloween candy energy!
Spooky Scavenger Hunt
Another great idea is a spooky scavenger hunt. Hide crafted items around the house or yard, like paper plate spiders or tissue paper ghosts, and give the kids clues to find them. You can make the clues rhyming, or even use simple drawings to make it more engaging for six-year-olds. It’s like a treasure hunt with a Halloween theme! Once they find the hidden crafts, they can either keep them, or you can have them use the crafts as part of another game. The scavenger hunt gets them moving and thinking, and it's a fun way to get them to interact with the crafts they've made. I once did a scavenger hunt where the final clue led to a "treasure chest" filled with art supplies, the kids loved it!
Game | How to Play | Crafty Twist |
|---|---|---|
Crafty Costume Parade | Kids show off costumes | Costumes must include handmade elements |
Spooky Scavenger Hunt | Find hidden items using clues | Hidden items are handmade crafts |
Pin the Boo on the Ghost
Lastly, let’s not forget the classic "Pin the Tail on the Donkey," but with a Halloween twist! Create a large ghost drawing or print one out, and have the kids try to pin a "boo" (a paper cutout) in the right spot while blindfolded. You can even make the "boos" out of different colored paper or have them decorate them before playing. It's a simple game that's always a hit, and it gets even better with a homemade touch. The kids will laugh and giggle, it really brings out their competitive spirit in a fun and harmless way. It’s these little moments of joy and laughter that make Halloween so special. And these activities ensure that the fun doesn't stop when the crafting is done; it keeps the creativity going!
Halloween Crafts: A StepbyStep Guide for 6 Year Olds
Halloween Crafts: A StepbyStep Guide for 6 Year Olds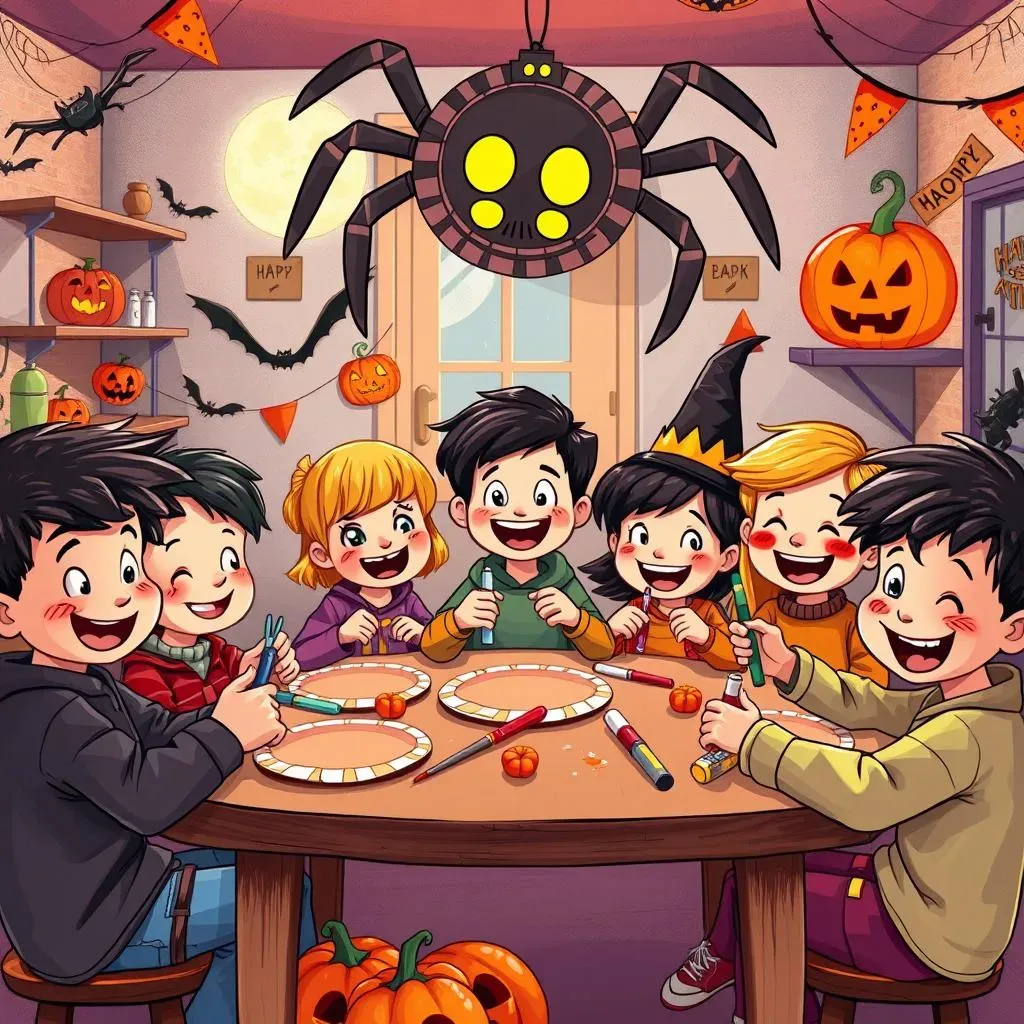
Okay, so you've got the ideas, but maybe you're thinking, "How do I actually make these things with a bunch of energetic six-year-olds?" Don't worry, I got you. It's all about breaking it down into simple, manageable steps. We’re not aiming for perfection here, we’re aiming for fun and participation. Think of it like a cooking recipe, but instead of delicious food, you end up with spooky cute crafts. I'm going to walk you through a couple of the crafts we talked about, so you can see just how easy it is to create some Halloween magic. It's about keeping it simple, using clear instructions, and making sure the kids are involved every step of the way.
Let's start with the paper plate spiders. First, grab a paper plate and some paint. Let the kids paint the plate any color they want, black, purple, green, or even rainbow if they're feeling extra funky. While the paint is drying, cut some pipe cleaners into smaller pieces and bend them into spider legs. Once the plate is dry, glue on the googly eyes and then attach the legs using glue or tape. That’s it. You’ve got a super easy, super cute spider. For the handprint ghosts, it’s even easier. Just get some white paint and have your little ones make a handprint on a piece of black paper. Let it dry, then add googly eyes and a marker mouth. Boom, instant ghost! Remember, the key is to do it together, and not to worry about the small mistakes. They are just part of the fun.
Craft | Steps |
|---|---|
Paper Plate Spiders | 1. Paint paper plate. 2. Cut pipe cleaners into legs. 3. Glue on eyes and legs. |
Handprint Ghosts | 1. Paint hand white. 2. Press on black paper. 3. Add eyes and mouth. |
Now, let's tackle the ghost garland. Take some white tissue paper and fold it a few times, then cut out simple ghost shapes. You don’t need to be perfect; remember, ghosts are supposed to be a bit wonky. Give the ghosts some googly eyes and draw a simple mouth with a marker. Then, using a needle and thread, or even just some tape, string them together to make a garland. And finally, for the paper plate bats, paint a paper plate black. Once it’s dry, cut out some simple bat wings from black construction paper, and glue them on. Add some googly eyes, and you’ve got an adorable bat. These step-by-step instructions are designed to be easy for both you and the kids, so that everyone can get in on the crafting fun.
The most important thing is to be patient and let the kids express themselves. If the spider legs aren't perfectly aligned, or the ghost mouth is a bit crooked, that’s totally fine! The point is to have fun, create memories, and get into the Halloween spirit. Remember, it’s about the journey, not just the destination. With these simple step-by-step guides, you'll be crafting like pros in no time. And who knows, maybe you'll even discover your inner artist along the way. So, get your craft supplies ready, gather the kids, and let’s make this Halloween the most creative one yet. I really think that doing these crafts together is going to make this Halloween super special for everyone involved.