Table of Contents
Get ready for some not-so-scary fun with Halloween paper crafts for kids! Are you looking for a way to keep little hands busy and get into the spooky spirit? Then you've come to the right place! This article is packed with easy and fun ideas for making your own Halloween decorations using just paper, scissors, and a bit of imagination. We’re talking about everything from cute bats and creepy spiders to grinning pumpkins and ghostly figures. We’ll walk you through simple steps to create awesome crafts that will make your home the spookiest on the block. Think of it as transforming ordinary paper into extraordinary Halloween magic. So, grab your supplies, and let's dive into the world of Halloween paper crafts for kids! We'll cover how to make simple decorations and even some cool 3D paper projects. Get ready to be amazed at how much fun you can have with just paper!
Simple & Spooky Halloween Paper Crafts for Little Hands
Simple & Spooky Halloween Paper Crafts for Little Hands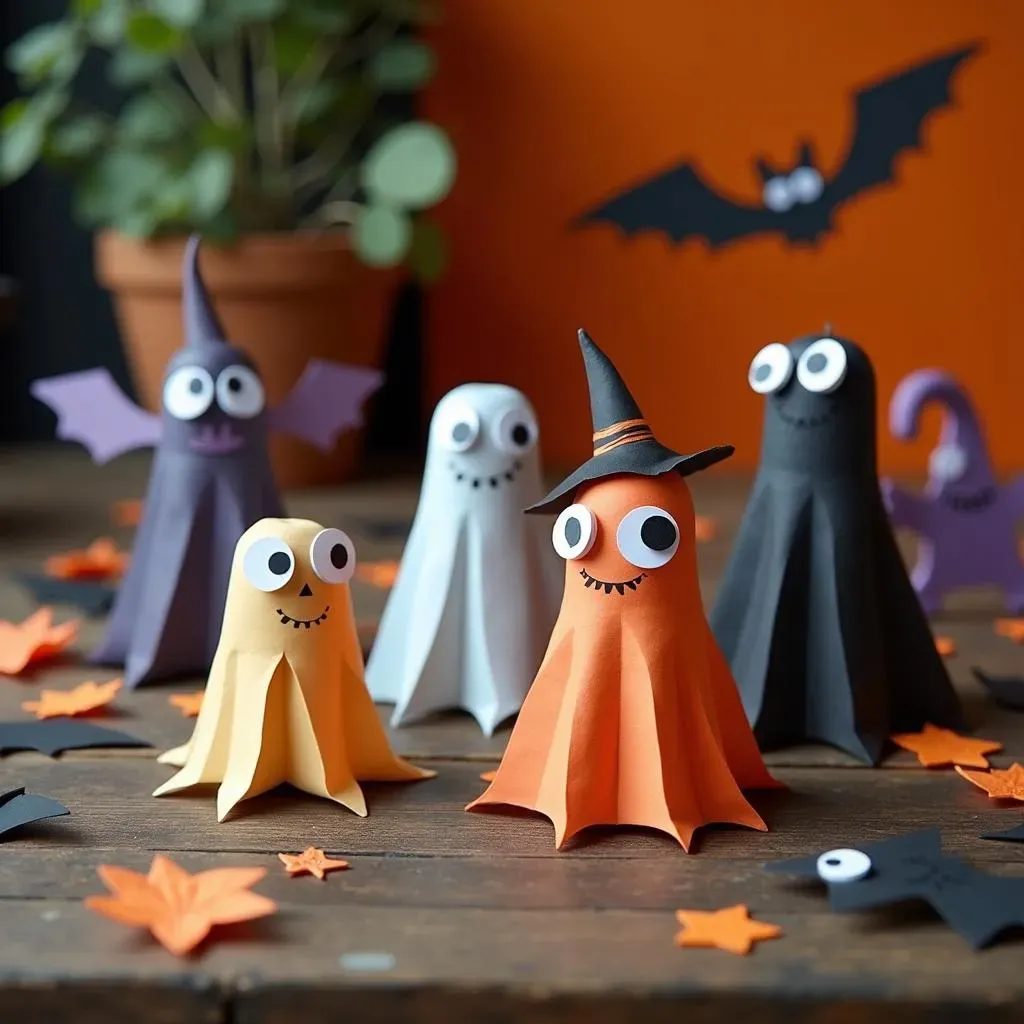
Okay, so you want to dive into making some Halloween magic with paper? Awesome! Let's start with the basics, the easy peasy stuff that even the littlest goblins can handle. Think simple shapes, big cuts, and minimal fuss. We're talking about things like paper ghosts that can be cut out with just a few snips, or maybe some super simple bats made by folding paper in half and cutting out a wing shape. Don’t worry about getting it perfect; the wonkier, the better! It’s all about having fun, and these projects are perfect for building up kids' confidence while making something cool. Remember, it's not about perfection; it's about the joy of creating something spooky (but not too spooky!) together.
Crafting Creepy Crawlies: Bat and Spider Halloween Paper Crafts
Crafting Creepy Crawlies: Bat and Spider Halloween Paper Crafts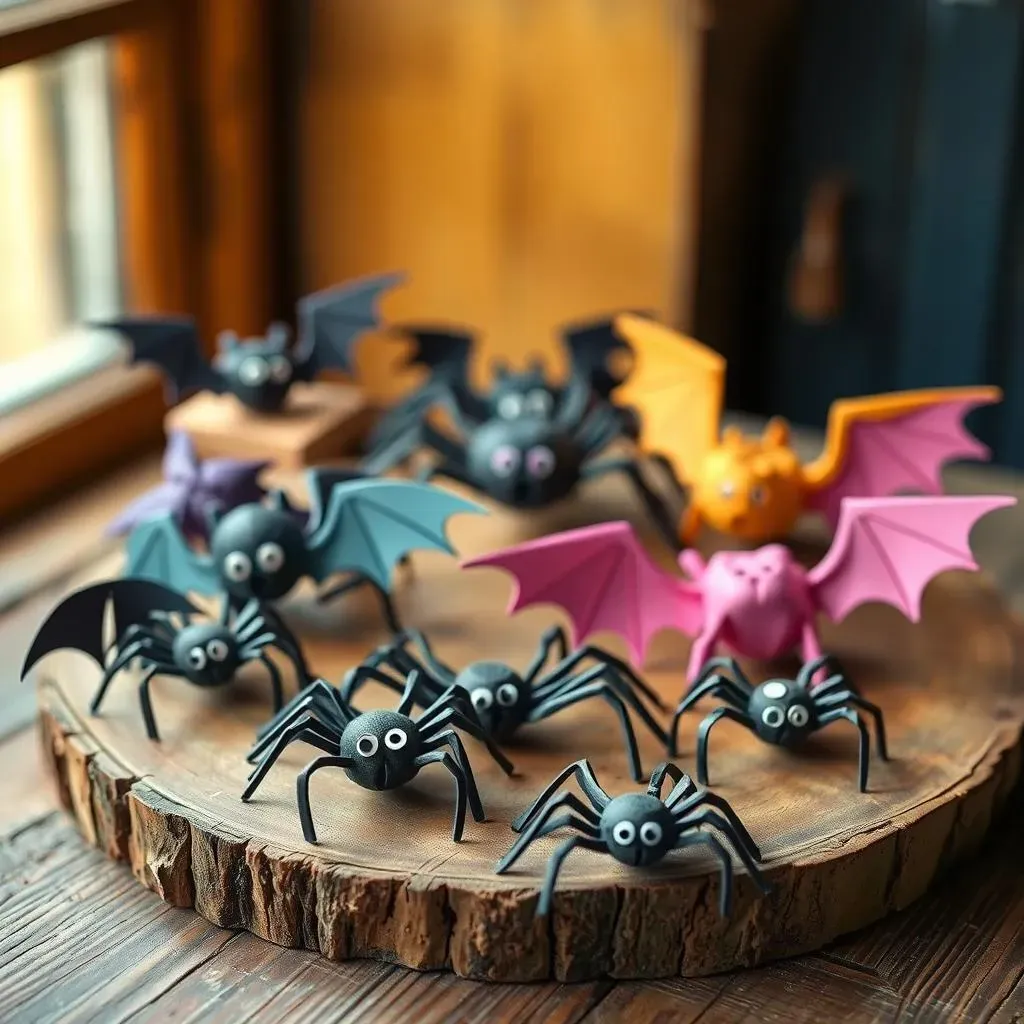
Batty Fun: Easy Paper Bat Crafts
Alright, let's get batty! Making paper bats is super fun, and there are a bunch of ways to do it. The simplest way? Fold a piece of black paper in half, draw half a bat shape along the fold, then cut it out! Bam! You've got a symmetrical bat. For extra fun, you can add little white paper fangs or googly eyes. You can even cut slits in the wings to make them look more feathery. I remember one year, we made a whole swarm of these and hung them from the ceiling, it looked like a real bat cave! So, don't be afraid to experiment with different wing shapes and sizes; every bat is unique!
Another cool trick is to make 3D bats. You can do this by cutting out two identical bat shapes, then making a slit in each from the top and bottom, and sliding them together. It creates a cool, stand-up bat that looks like it's ready to take flight. You can also use different colors for the wings and body to make them pop. Little details like this can really make your crafts stand out. Try using glitter glue to add some sparkle, or even drawing little faces with markers. The key is to make each bat have its own personality; no two bats are ever the same!
Bat Craft Idea | Materials | Difficulty |
|---|---|---|
Simple Folded Bats | Black paper, scissors | Easy |
3D Stand-up Bats | Black paper, scissors, optional glue | Medium |
Glitter Bats | Black paper, scissors, glitter glue | Easy |
Spooky Spiders: Crafting Paper Spiders
Now, let’s spin some spider webs! Paper spiders are another super fun craft, and they can be as simple or as complicated as you like. For the easiest version, cut out a simple circle for the body and some long strips for the legs. Glue those legs on, and you've got a basic spider. Add googly eyes, and maybe some little fangs cut from white paper, and your spider is ready to go! I used to think spiders were creepy, but once I started making them out of paper, they became way less scary and way more fun!
For a more advanced spider, try making a paper plate spider. Cut out some strips of black paper for the legs and glue them around the edge of a paper plate. Then, glue on a black circle for the body and add some eyes and fangs. You can even attach a string and hang your spider from the ceiling, making it look like it's descending from a web. Another cool way to make spider legs is to fold a long piece of paper back and forth, like an accordion, and then attach it to the body. This gives the legs a cool, bendy look. I've even seen people make tiny paper spiders and attach them to a paper web, which looks really awesome!
- Use black construction paper for the spider's body and legs.
- Add googly eyes for a fun, cartoonish look.
- Try using pipe cleaners for bendable legs.
- Draw a web on a paper plate and attach your spider.
Pumpkin Patch Fun: Paper Pumpkin & Jacko'Lantern Halloween Crafts
Pumpkin Patch Fun: Paper Pumpkin & Jacko'Lantern Halloween Crafts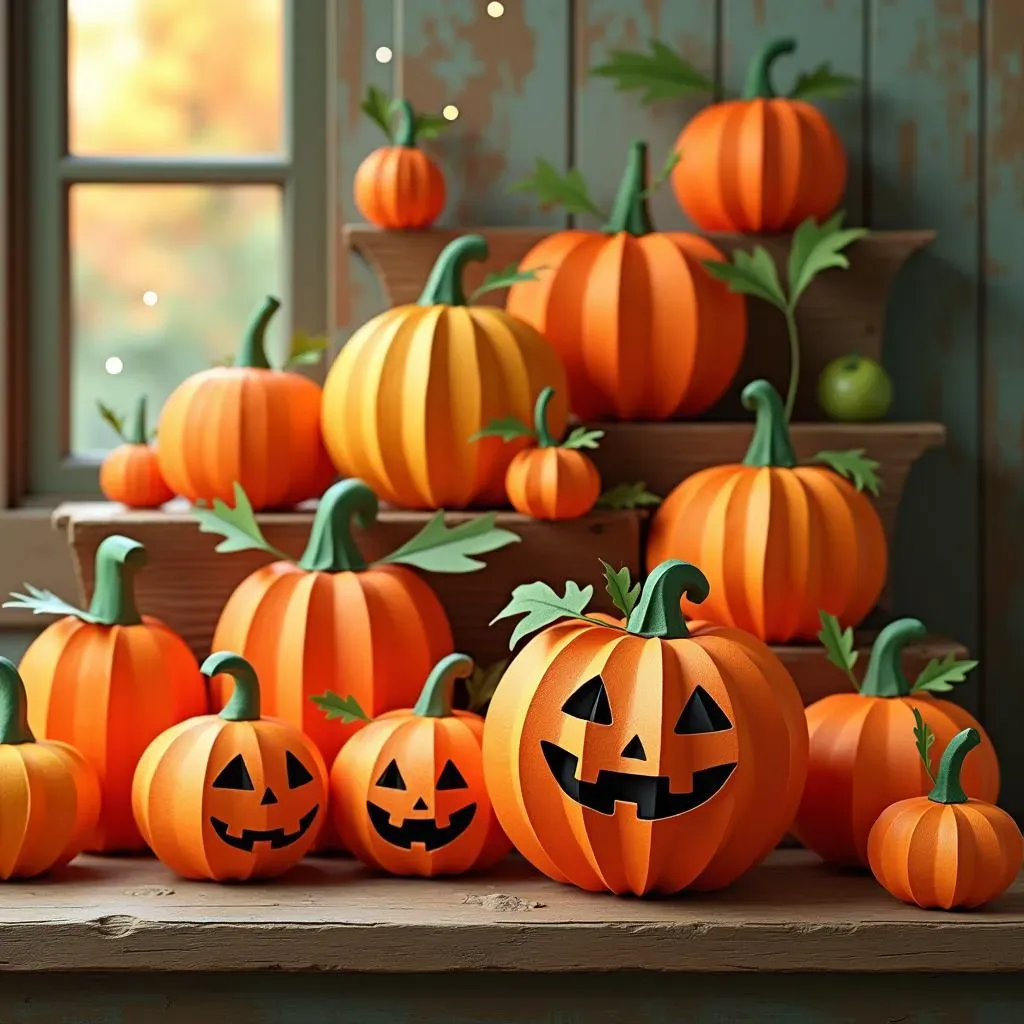
Perfect Paper Pumpkins: Simple & Sweet
Okay, time to get into the pumpkin spirit! Making paper pumpkins is super easy and a total blast. One super simple way is to cut out a bunch of orange paper strips, then glue them together at the top and bottom to make a round pumpkin shape. It’s like creating a little paper cage that looks like a pumpkin! You can use different shades of orange and even add a green paper stem to the top. I remember once, my little cousin made a whole patch of these, and we strung them up across the living room, it looked like a real mini pumpkin patch indoors. It's amazing how a few strips of paper can transform into something so festive. Don't be afraid to experiment with different widths for the strips to give each pumpkin its own unique look; some can be fat, some can be thin, just like real ones!
Another fun method is to make 3D paper pumpkins. You can do this by cutting out several identical pumpkin shapes, then folding them in half and gluing them together to create a 3D sphere. It's like a paper version of a pop-up book! Add a small green paper stem and you're all set. I once saw a craft that used patterned paper for this, and it looked incredible. It’s a fun way to use up any leftover scrapbook paper you might have. You can also add some glitter to make them sparkle, or use markers to draw on little faces, making each one a unique character in your pumpkin patch. The best part is that these paper pumpkins can be used as decorations for years to come!
Pumpkin Craft Idea | Materials | Difficulty |
|---|---|---|
Paper Strip Pumpkins | Orange paper, scissors, glue | Easy |
3D Paper Pumpkins | Orange paper, scissors, glue | Medium |
Patterned Paper Pumpkins | Patterned paper, scissors, glue | Medium |
Jack-o'-Lanterns: Crafting Spooky Faces
Now, let's get a little spooky with Jack-o'-lanterns! Making these out of paper is a great way to get creative without having to carve a real pumpkin, which can be a bit messy. Start with a basic orange paper pumpkin shape, then cut out different shapes for the eyes, nose, and mouth. You can make them scary, funny, or just plain silly! I once made one with triangle eyes and a big toothy grin, and it looked so goofy but so awesome. Try using black paper for the facial features, it really makes them pop against the orange. Let your imagination run wild, the more creative the faces, the better!
Another cool idea is to create a paper bag Jack-o'-lantern. Take a small paper lunch bag, draw a face on it, and then fill it with some crumpled paper to give it a 3D effect. You can even put a battery-operated tea light inside to make it glow. It’s like having your own mini, safe, glowing pumpkin. I remember one time we made a whole bunch of these and lined them up on our porch, it was like our own little pumpkin parade. You can also use different colors for the bags, like white for ghost pumpkins or green for Frankenstein pumpkins. Get creative and have fun making your own unique Jack-o'-lanterns!
- Use orange paper for the base of your Jack-o'-lantern.
- Cut out different shapes for the eyes, nose, and mouth.
- Use black paper for the facial features for a bold contrast.
- Add a battery-operated tea light for a glowing effect.
Haunted House & Ghostly Figures: More Halloween Paper Crafts Kids Love
Haunted House & Ghostly Figures: More Halloween Paper Crafts Kids Love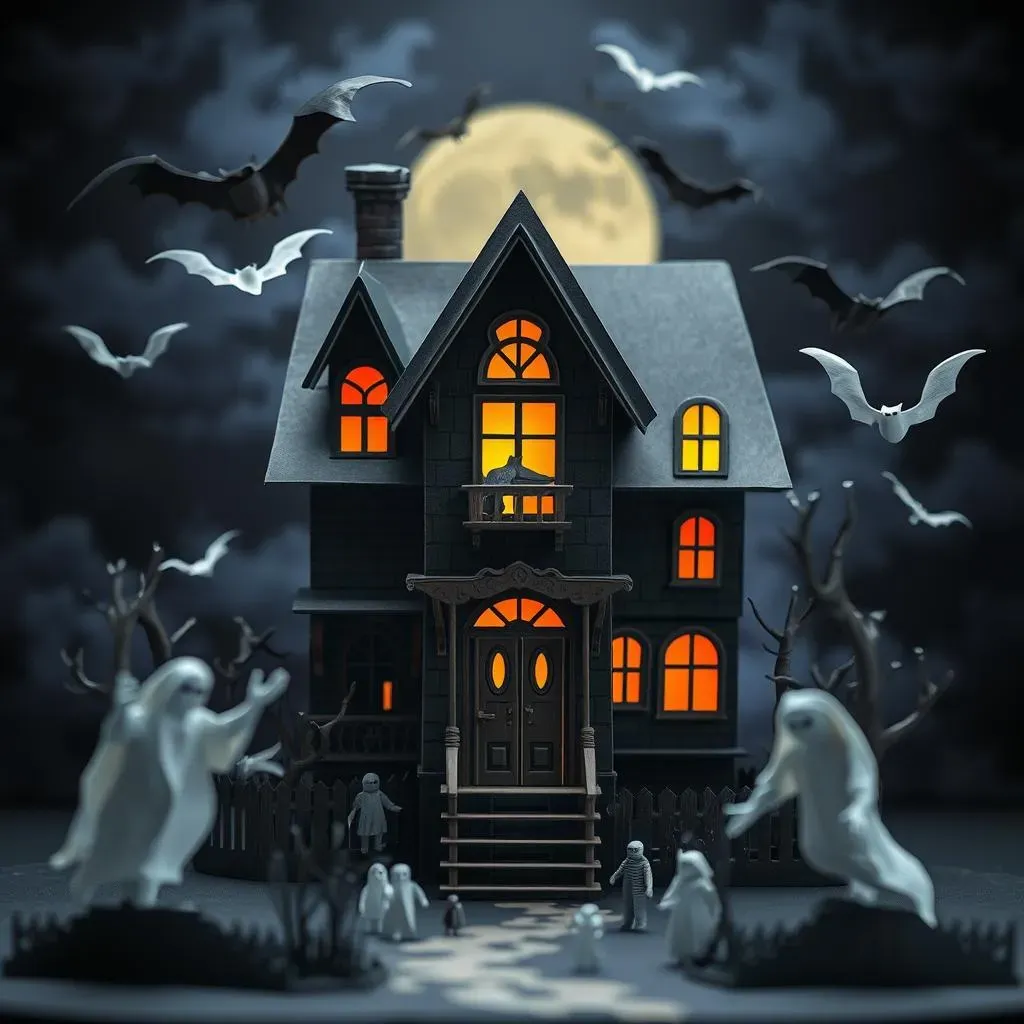
Alright, let's talk about taking our paper crafts to the next level, shall we? We're moving from cute pumpkins to spooky haunted houses and ghostly figures. Making a paper haunted house might sound tricky, but it’s actually a lot of fun. You can start with a simple box shape and add details like windows, doors, and maybe even a crooked chimney. The key here is to use dark colors like black and purple to really set the creepy mood. I remember one year, I made a haunted house with a bunch of little paper bats flying around it, and it looked like a scene straight out of a spooky movie. It was so much fun to create a whole mini-scene with just some colored paper and imagination. Don’t be afraid to add silly details, like crooked windows or a wonky door, it's all part of the fun!
Now, let's get ghostly! Paper ghosts are super simple to make, and there are so many ways to get creative with them. You can cut out simple ghost shapes from white paper, or you can get a little fancier and make 3D ghosts. One cool way to make a 3D ghost is to take a paper circle, make a cut to the center, then overlap the edges to create a cone shape. You can add some googly eyes or draw a spooky face to make it even more ghostly. I once made a whole string of these and hung them across my window, they looked like they were floating in the breeze. You can also use different kinds of paper, like tissue paper, to give your ghosts a translucent, floaty feel. Remember, each ghost can have its own personality, so don't be afraid to experiment with different shapes and sizes.
Craft Idea | Materials | Difficulty |
|---|---|---|
Simple Paper Haunted House | Black and purple paper, scissors, glue | Medium |
3D Paper Ghosts | White paper, scissors, glue, googly eyes | Easy |
Tissue Paper Ghosts | Tissue paper, scissors, glue, string | Easy |
Wrapping Up Our Spooky Paper Craft Adventure
Well, there you have it – a whole bunch of fantastic Halloween paper crafts for kids that you can make at home! From simple cut-outs to more intricate designs, hopefully, you've found some inspiration to get your creative juices flowing. Remember, crafting is all about having fun and letting your imagination run wild. Don’t worry about making everything perfect; the best part is the process of creating and sharing your spooky decorations. So go ahead, deck out your space with your handmade bats, pumpkins, and ghosts, and have a happy and crafty Halloween! And hey, don't forget to show off your creations to friends and family!