Table of Contents
Christmas is a time for togetherness, warmth, and of course, crafting! This year, ditch the generic store-bought decorations and unleash your creativity with our guide to joyful Christmas crafts. Whether you're a seasoned crafter or a complete beginner, we've got something for everyone. Get ready to transform simple materials into stunning, personalized ornaments and decorations that truly capture the spirit of the season. We'll explore a range of "joy Christmas craft" projects, from easy-to-make creations perfect for kids to more intricate designs that will impress even the most discerning holiday enthusiasts. Prepare to discover ingenious ways to repurpose everyday items, turning them into unique festive treasures. This isn't just about making decorations; it's about creating lasting memories and sharing the joy of crafting with loved ones. So grab your glue, glitter, and a whole lot of holiday cheer – let's get started!
Simple Joy Christmas Crafts for Beginners
Simple Joy Christmas Crafts for Beginners
Paper Snowflake Magic
Let's start with the classic! Paper snowflakes are incredibly easy, requiring only paper and scissors. Fold a square piece of paper several times, then cut out various shapes. Unfold to reveal a unique snowflake. You can experiment with different folding techniques and cuts to create a whole blizzard of beautiful snowflakes. It's a great activity for kids, too – let them unleash their creativity and make a whole family of snowflakes! This is a perfect entry point to the world of Christmas crafting; it's inexpensive, quick, and results in beautiful decorations.
Think about different paper types – colored paper, patterned paper, even wrapping paper scraps can add a fun twist! Once you've mastered the basics, you can try adding glitter or tiny pom-poms for extra sparkle. Remember, there's no such thing as a "wrong" snowflake – embrace the imperfections and enjoy the process.
Material | Difficulty | Time |
|---|---|---|
Paper, Scissors | Beginner | 10-15 minutes |
Salt Dough Ornaments: A Sweet Treat
Salt dough ornaments are another fantastically simple option. Mix flour, salt, and water to create a dough, then roll it out and use cookie cutters to create festive shapes. Bake until hard, then let them cool. Once cool, you can decorate them with paint, glitter, markers – anything you like! These are durable and can be hung on the tree year after year, becoming cherished family heirlooms. They’re also super customizable – you can make them in various colors and shapes, matching your tree’s theme.
A great tip is to use a straw to poke a hole at the top before baking, making it easy to thread ribbon or string for hanging. Get creative with your designs! You could even add things like buttons, beads, or small charms for extra embellishments. Remember to supervise children closely during the baking process.
- 1 cup flour
- ½ cup salt
- ¾ cup water
- Cookie cutters
- Paint, glitter, etc.
Joyful Christmas Crafts Using Recycled Materials
Joyful Christmas Crafts Using Recycled Materials
Recycled Cardboard Christmas Trees
Who needs to buy a Christmas tree when you can make one out of recycled cardboard? This is a fantastically sustainable and fun project. Simply cut out different sized triangles from cardboard boxes (cereal boxes work perfectly!), then stack and glue them together to create a tree shape. You can paint it green, add glitter, or even decorate it with small scraps of fabric or paper. Get creative with the base – a small wooden circle or even a repurposed jar lid can work wonders. This is a great way to use up those boxes piling up in the recycling bin, and the result is a unique and eco-friendly Christmas tree.
Think outside the box (pun intended!) – you can add lights, small ornaments, or even tiny pom-poms to your cardboard tree. Consider using different colors of cardboard to create a more visually interesting tree. If you’re feeling ambitious, you could even create a whole forest of mini cardboard trees for a truly unique festive display. It’s amazing what you can create with a little imagination and some recycled materials!
Material | Source | Difficulty |
|---|---|---|
Cardboard boxes | Recycling bin | Easy |
Glue | Craft store | N/A |
Paint, glitter, decorations | Craft store/home | N/A |
Egg Carton Christmas Ornaments
Egg cartons are surprisingly versatile crafting materials! Cut out individual cups from the carton, then shape them into festive forms like stars, bells, or even little Christmas trees. You can paint them in bright, festive colors, add glitter, or glue on small beads and sequins. Once they are dry, attach a string or ribbon for hanging. These tiny ornaments add a unique touch to your tree and are a great way to reduce waste. It's amazing how something seemingly destined for the trash can become a beautiful Christmas decoration.
Don't be afraid to experiment with different paint techniques – try sponging, stippling, or even using different textures of paint to create a more dimensional effect. You can also add small details using a fine-tipped paintbrush, like tiny lines or dots. Once your ornaments are dry, seal them with a clear coat of varnish or sealant to help them last longer. The possibilities are endless – let your imagination run wild!
- Egg cartons
- Scissors
- Acrylic paints
- Glitter, beads, sequins
- Glue
- Ribbon or string
Advanced Joy Christmas Crafts: Impress Your Friends
Advanced Joy Christmas Crafts: Impress Your Friends
Beaded Christmas Ornaments: A Touch of Elegance
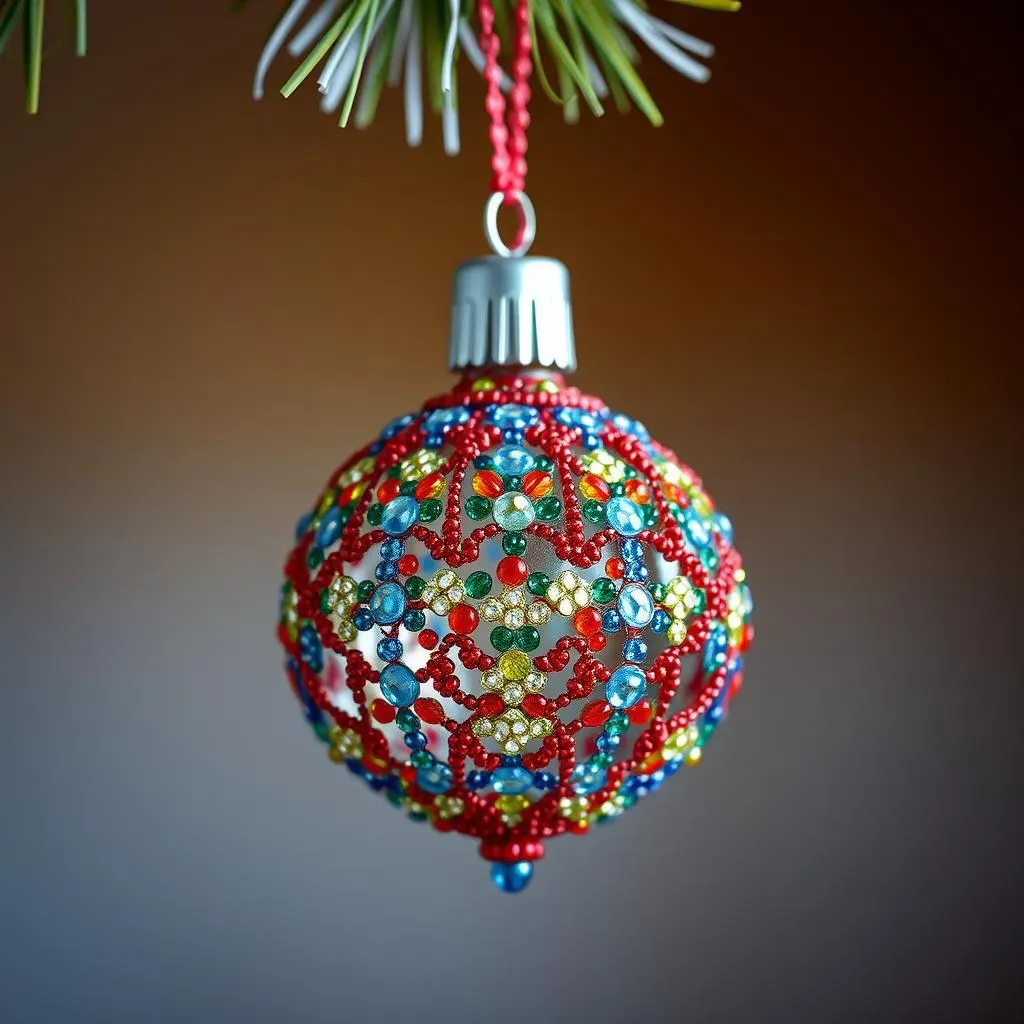
For a touch of sophisticated sparkle, try creating beaded Christmas ornaments. This project requires more patience and precision than the previous ones, but the results are stunning. You'll need various colors of beads, strong thread or wire, and perhaps some decorative findings like small charms or pendants. Start by stringing beads onto the thread or wire, following a pattern or design of your choosing. You can create simple repeating patterns or more complex designs, depending on your skill level. Once you've created your beaded strand, carefully shape it into an ornament, securing the ends. You can use glue, wire, or even a small clasp to keep the beads in place. This project allows for incredible personalization – match your bead colors to your home's décor or create ornaments that represent personal interests.
Consider using different bead sizes and textures to add visual interest. You could incorporate sequins, pearls, or even small crystals for extra sparkle. Remember to use a strong thread or wire to ensure your ornaments hold their shape and don't break easily. Once completed, these beaded ornaments will add a touch of class and elegance to your Christmas tree.
Material | Description |
|---|---|
Beads (various colors and sizes) | Choose a variety of colors and sizes for visual interest. |
Strong thread or wire | Ensure the thread or wire is strong enough to hold the weight of the beads. |
Needle (if using thread) | A small, sharp needle will make threading the beads easier. |
Decorative findings (optional) | Small charms, pendants, or other decorative elements can add a personal touch. |
Intricate Paper Quilling Ornaments: A Delicate Touch
Paper quilling is an art form that involves rolling, shaping, and gluing strips of paper to create intricate designs. This technique allows for the creation of incredibly detailed and delicate Christmas ornaments. You'll need thin strips of colored paper, a quilling tool (or a toothpick!), and glue. Start by rolling the paper strips tightly, then carefully loosen them to create different shapes. Glue the shapes together to form your ornament design, which can range from simple snowflakes to elaborate Christmas trees. This is a more advanced project, requiring patience and precision, but the final result is a stunningly unique ornament that will impress everyone.
Experiment with different paper colors and textures to create unique designs. You can also incorporate glitter, small beads, or other embellishments to add extra detail. Once your design is complete, allow the glue to dry completely before handling. You can then add a ribbon or string for hanging. These ornaments are not only beautiful but also a testament to your skill and dedication. It’s a rewarding project that provides a sense of accomplishment and a beautiful decoration for your tree.
- Thin strips of colored paper
- Quilling tool or toothpick
- Glue
- Tweezers (for precise placement)
- Ribbon or string for hanging
DIY Felt Christmas Stockings: A Personalized Touch
Felt is a wonderfully versatile material for crafting, and it's perfect for creating personalized Christmas stockings. You'll need felt in various colors, embroidery floss or fabric markers, scissors, and stuffing (optional). Cut out two identical stocking shapes from the felt, then decorate them with embroidery, fabric markers, or even small embellishments like buttons or beads. Sew the two stocking pieces together, leaving a small opening for turning and stuffing. Turn the stocking right side out, stuff it (if desired), and then carefully sew the opening closed. These stockings can be personalized with names, initials, or even small embroidered designs, making them truly unique and special gifts. They’re also surprisingly durable and can be used year after year.
Consider using different textures of felt to add visual interest. You could incorporate sequins, beads, or small charms for extra embellishment. Get creative with your designs – you could embroider snowflakes, Christmas trees, or even whimsical characters. Once your stockings are complete, they'll be a cherished addition to your holiday décor and a treasured keepsake for years to come. The personal touch adds a special warmth to the festive season.