Table of Contents
Hey there, crafty kids! Thanksgiving is just around the corner, and what better way to celebrate than with some super cool, homemade decorations? If you're in 2nd grade, you're at the perfect age to get your hands dirty and create some amazing Thanksgiving crafts! This article is your go-to guide for all things festive and fun. We're talking about easy-peasy turkey projects, dazzling decorations, and special keepsakes that'll make this Thanksgiving one to remember. Get ready to explore a bunch of ideas that are not only simple to make but also a blast to create, even if you're not a pro artist. We'll cover everything from paper plate turkeys to thankful placemats, making sure there's something for everyone. So, grab your crayons, scissors, and glue, and let's dive into a world of awesome thanksgiving crafts for 2nd graders. We're about to make this holiday season extra special with our own creative touches!
Easy Turkey Crafts for 2nd Graders
Easy Turkey Crafts for 2nd Graders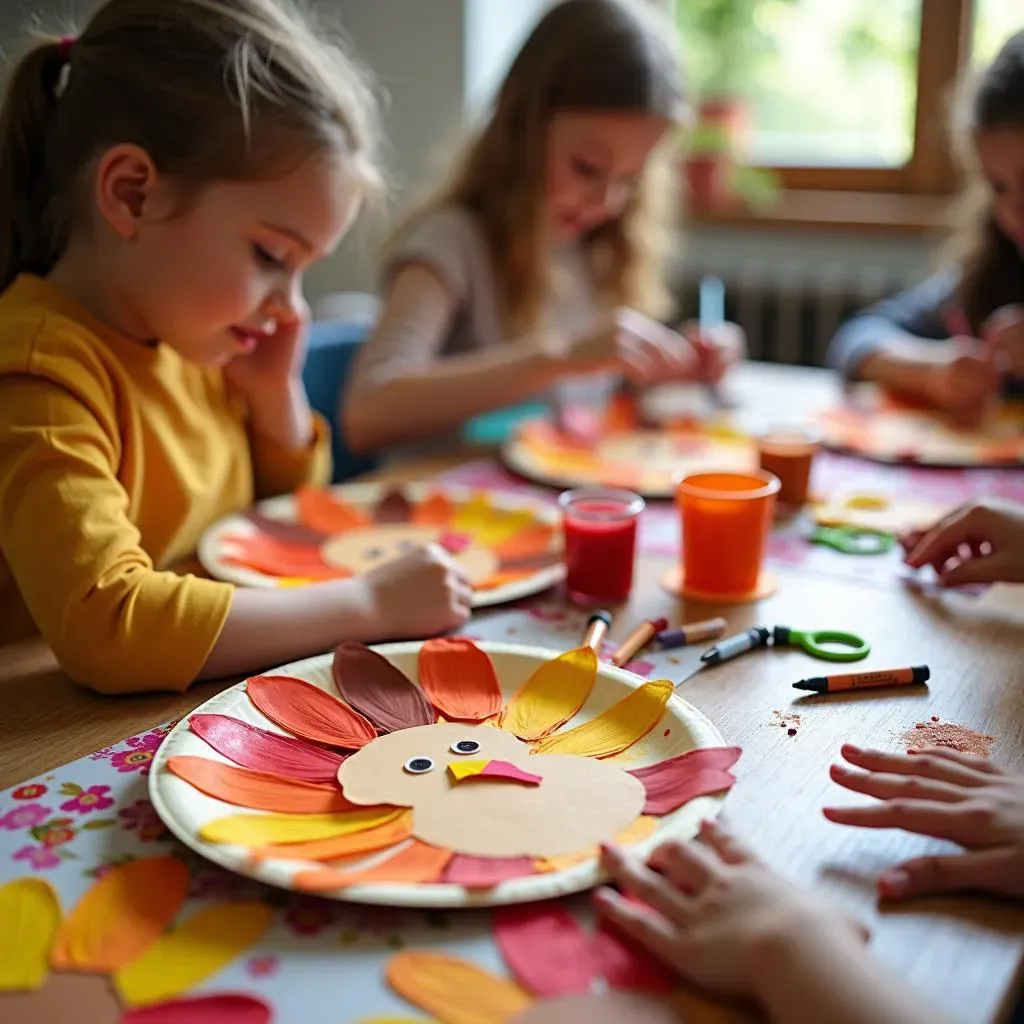
Paper Plate Turkey Fun
Let's kick things off with a classic: the paper plate turkey! This one is super simple, and you probably already have most of the stuff at home. Grab a paper plate – any size will do – and some colored construction paper. Cut out feather shapes from the colored paper, maybe red, orange, yellow, and brown. You can make them pointy or rounded, whatever you like. Then, glue those feathers all around the edge of the paper plate. For the turkey's body, cut a small circle from brown paper and glue it in the middle. Add some googly eyes, a small orange triangle for the beak, and maybe a red wattle. Boom! You have a cute and easy turkey.
Here’s a fun twist: try using different textures for the feathers. Think about using bits of felt, fabric scraps, or even dried leaves. It'll make your turkey even more interesting and fun to touch. You could also make a whole bunch of them and create a turkey family! This craft is great because it’s not only easy but also lets you be super creative. Don't worry about making it perfect; just have fun!
Handprint Turkey Keepsakes
Now, let's get a little messy – in a good way! Handprint turkeys are not only adorable but also make fantastic keepsakes. You'll need some brown paint, a piece of white paper, and maybe some markers or crayons. Simply cover your hand in brown paint and press it down firmly on the paper, fingers spread out. This will be the turkey's body and feathers. Once it's dry, use your markers or crayons to draw on the details. Add googly eyes, a beak, and some legs. You can also draw in extra feathers or even a little hat for your turkey.
This craft is perfect for capturing a moment in time, and it's fun to look back on later. Think about adding the date to the back, so you remember when you made it. You could also use different colors of paint to make rainbow turkeys. It’s all about having fun and making something unique. Plus, it's a great way to see how much your hand grows over the years! These handprint turkeys make awesome gifts for family members too.
Craft | Materials | Tips |
|---|---|---|
Paper Plate Turkey | Paper plate, colored paper, glue, googly eyes | Use different textures for feathers. |
Handprint Turkey | Brown paint, paper, markers, googly eyes | Add the date and use different colors. |
Creative Thanksgiving Decorations and Activities for 2nd Graders
Creative Thanksgiving Decorations and Activities for 2nd Graders
Festive Fall Leaf Garland
Let's bring the beauty of fall indoors with a colorful leaf garland! This is a super fun and easy way to make your classroom or home feel extra festive. First, gather some fallen leaves – the more colors, the better! You can use real leaves or cut out leaf shapes from construction paper. If you're using real leaves, try pressing them between books for a day or two to flatten them out. Then, grab some string or yarn and start attaching the leaves. You can use tape or glue, whatever works best. Space them out evenly and voila! You’ve got a beautiful garland to hang up and enjoy.
For an extra touch, you could add some glitter or paint to the leaves to make them sparkle. You can also use different shapes and sizes of leaves to add more visual interest. This garland is not only a fun decoration but also a great way to talk about the changing seasons. It's a simple project that can make a big impact on your space. Plus, it's a great way to get outside and gather some awesome materials!
Thankful Placemats
Now, let's make mealtime a little more special with some thankful placemats. This is a fun activity that gets everyone thinking about what they're grateful for. Start with a large piece of paper or cardstock – any color will do. Then, use markers, crayons, or colored pencils to decorate your placemat. You can draw pictures of things you are thankful for or write out a list of people, places, or things that make you happy. You can even add some fall-themed doodles like pumpkins, leaves, and turkeys.
To make your placemat extra special, consider laminating it or covering it with clear contact paper to make it durable and reusable. These placemats are not only a great way to decorate the table but also a fun conversation starter at dinner. You can even make them as a gift for your family members. It's a creative and thoughtful way to express your gratitude. Plus, it’s a fun project that the whole family can get involved in!
Craft | Materials | Tips |
|---|---|---|
Fall Leaf Garland | Leaves, string, tape or glue | Add glitter or paint for sparkle. |
Thankful Placemats | Paper, markers/crayons, laminator (optional) | Laminate for durability. |
Pumpkin Decorating Fun
Let's not forget the mighty pumpkin! Pumpkins are not just for carving; they’re also awesome for decorating. Grab some small pumpkins – real or craft – and get ready to make them shine. Instead of carving, try painting them with fun designs. You can use different colors, patterns, and even add some glitter or googly eyes. Try making a mini pumpkin patch with different designs. You can even turn your pumpkins into different characters or animals.
Another idea is to use washi tape to create geometric patterns or fun stripes. This method is super simple, and it’s a great way to get creative without making a mess. You can also add some yarn or ribbon to make your pumpkins look extra fancy. Pumpkin decorating is a great activity for a party or just a fun afternoon at home. It’s all about using your imagination and making something unique. These pumpkins will look great as centerpieces or decorations around your home or classroom.
Thankful Projects and Keepsakes: Thanksgiving Crafts for 2nd Grade
Thankful Projects and Keepsakes: Thanksgiving Crafts for 2nd Grade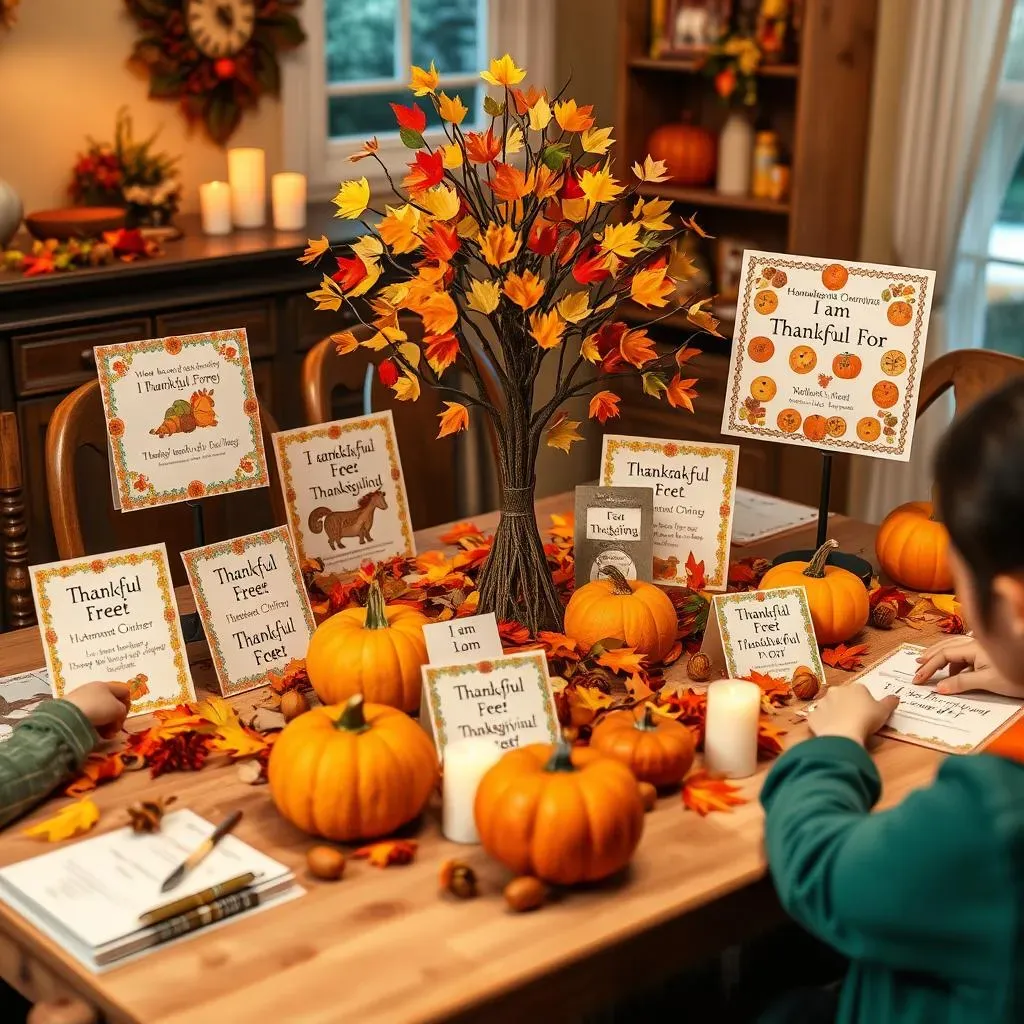
Gratitude Journals
Okay, let’s switch gears a bit and focus on projects that help us think about what we’re thankful for. A gratitude journal is a fantastic way to do just that! It's not just about writing, it's about reflecting and appreciating all the good things in our lives. Start with a notebook or some blank paper. Decorate the cover with markers, stickers, or even some of the leaf cutouts we talked about earlier. Inside, write prompts for each day. You could write "I am thankful for..." or "Today I appreciated..." to guide your thoughts.
It doesn't have to be long or fancy, just a few sentences about what made you happy that day. This is a great project to keep going all year, not just during Thanksgiving. You could also draw pictures or add doodles to make it even more personal. Imagine looking back on it later and seeing all the things that brought you joy. This journal is a special place to cherish those happy moments. Plus, it helps you stay positive and grateful, which is always a good thing!
Thankful Tree
Now, let's grow a thankful tree! This craft is not only beautiful but also a great way to display all the things you are grateful for. You can make a tree from brown construction paper, cardboard, or even a real branch from outside. If you're using paper or cardboard, cut out a tree trunk and branches. Then, cut out leaf shapes from different colored paper. On each leaf, write or draw something you are thankful for. It could be your family, friends, pets, or even your favorite food.
Once you've written on all the leaves, attach them to the branches of your tree using glue or tape. You can make your tree as big or as small as you like. This craft is a fantastic way to decorate your home or classroom, and it’s also a great reminder of all the good things in your life. You can add to it every day leading up to Thanksgiving, making it a growing display of gratitude. It’s a simple yet powerful way to celebrate the holiday. Plus, it's a great conversation starter when you have visitors.
Craft | Materials | Tips |
|---|---|---|
Gratitude Journals | Notebook, markers, stickers | Write daily prompts. |
Thankful Tree | Paper, cardboard, or branch, leaf cutouts | Add leaves daily leading up to Thanksgiving. |
Personalized "I am Thankful For" Cards
Let’s not forget about sharing our thankfulness with the people we care about. Personalized "I am Thankful For" cards are a thoughtful way to show your appreciation. Grab some cardstock or construction paper and fold them into cards. Decorate the front with fall-themed drawings or designs. Inside, write a special message to someone you’re thankful for. You can tell them why you appreciate them or what they mean to you. These cards are a great way to make someone's day and show them how much you care.
You can also add a small drawing or sticker to make it even more special. These cards are perfect for giving to your family, friends, teachers, or anyone who has made a positive impact on your life. It’s a simple gesture that can mean a lot. This project helps you think about the people around you and express your gratitude in a personal and meaningful way. Plus, who doesn’t love getting a handmade card? It's a fantastic way to spread some Thanksgiving cheer!
Keepsake Turkey Ornament
Finally, let's create a keepsake turkey ornament that you can hang up every year. This is a fun and easy craft that will bring back memories of this Thanksgiving. You can use a variety of materials for this project, such as felt, foam, or even cardboard. Cut out a turkey shape from your chosen material. Decorate it with markers, glitter, or small craft supplies like beads or buttons. Add some colorful feathers, maybe made from felt or paper.
Attach a string or ribbon to the top so you can hang it up. You can even personalize it by adding your name or the year. This ornament is a great way to remember this Thanksgiving and all the fun crafts you made. It’s something you can keep for years to come and bring out every holiday season. It’s a fun and festive project that also serves as a wonderful keepsake. Plus, it's a great way to add a touch of your own creativity to your holiday decorations.
Craft | Materials | Tips |
|---|---|---|
"I am Thankful For" Cards | Cardstock, markers, decorations | Write personal messages. |
Keepsake Turkey Ornament | Felt, foam, or cardboard, decorations, string | Personalize with name and year. |