Table of Contents
Hey there, crafty kids and parents! Thanksgiving is just around the corner, and what better way to get into the spirit than with some awesome thanksgiving crafts for 7 year olds? I'm super excited to share some of my favorite ideas that are not only fun but also pretty easy to make. Forget about complicated projects that take forever; we're all about quick, creative, and memorable crafts. In this article, we’ll explore ways to make adorable turkey decorations that'll make your home festive and fun. We'll also dive into some cool Thanksgiving-themed activities that teach about gratitude. And of course, we'll even get a little messy with some edible crafts that are as tasty as they are fun to create. Get ready to unleash your inner artist and make this Thanksgiving the most creative one yet! I’ll show you how to create everything from simple paper crafts to slightly more involved decorations that you can display with pride. So, grab your scissors, glue, and a dash of imagination, and let’s get started!
Easy Turkey Crafts for 7 Year Olds
Easy Turkey Crafts for 7 Year Olds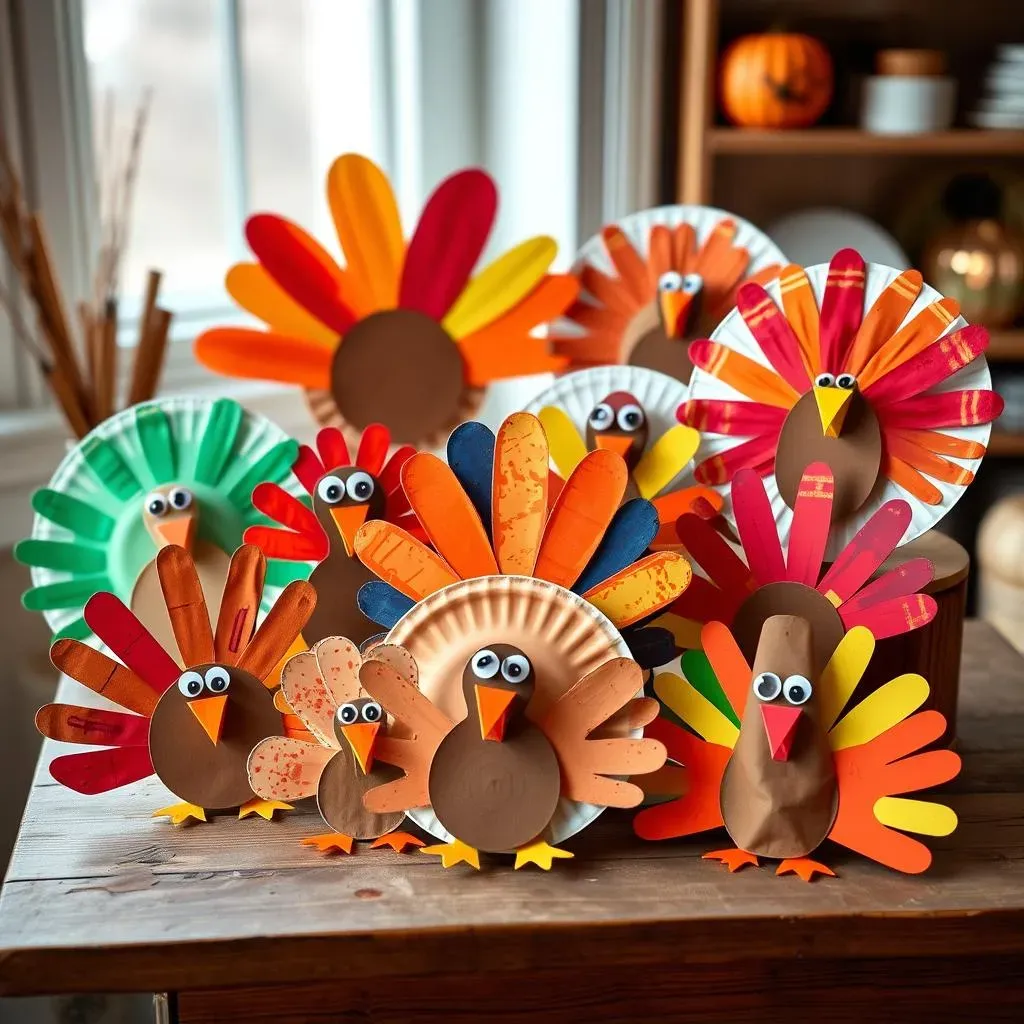
Paper Plate Turkey Fun
Okay, let's kick things off with a classic: the paper plate turkey! It's super simple and always a hit with the kiddos. Grab a paper plate – any size will do – and let your creativity run wild. We’re not going for perfection here, just pure fun. First, have the kids paint the plate brown or any color they like, really. Once it's dry, they can cut out feather shapes from colorful construction paper. Think reds, oranges, yellows, and maybe even some purples for a funky twist. Then, glue those feathers around the edge of the plate, and bam! You’ve got a turkey. Add some googly eyes, a construction paper beak, and a little red wattle, and it's ready to gobble its way into your heart.
For a bit more flair, try using different textures for the feathers. Instead of just paper, use felt, fabric scraps, or even real leaves that you’ve collected outside. This adds a tactile element that makes the craft even more engaging. You can also let the kids draw designs on the feathers with markers or crayons. This craft is fantastic because it is so adaptable. Each kid gets to make their own unique turkey, and honestly, some of their designs are more creative than anything I could come up with. And the best part? It uses supplies you probably already have lying around the house!
Handprint Turkey Memories
Next up, let’s make some handprint turkeys, which are not just cute but also make for a sweet keepsake. This one is super simple and a great way to capture how little those hands still are. Start by having your 7 year olds trace their hand on a piece of brown construction paper. This will be the turkey’s body. Then, they can cut it out. Now, for the feathers, we're going to use handprints again! Have them paint their hands with different colors and then press them onto another piece of paper. Let it dry, then cut out the handprints and arrange them like feathers fanning out from the turkey body.
Glue the handprint feathers to the back of the brown handprint body, then add the cute details—googly eyes, a beak, and a wattle. You can even add glitter for a bit of sparkle. I love this craft because it's both a craft and a memory. Years from now, you can pull these out and see how much those little hands have grown. Plus, it’s a good way to get a little messy, which, let's be honest, kids secretly love. These handprint turkeys are also great for making cards or decorating a Thanksgiving table.
Craft | Materials Needed | Fun Factor |
|---|---|---|
Paper Plate Turkey | Paper plates, paint, construction paper, glue, googly eyes | High |
Handprint Turkey | Construction paper, paint, glue, googly eyes | High |
Creative Thanksgiving Decorations for 7 Year Olds
Creative Thanksgiving Decorations for 7 Year Olds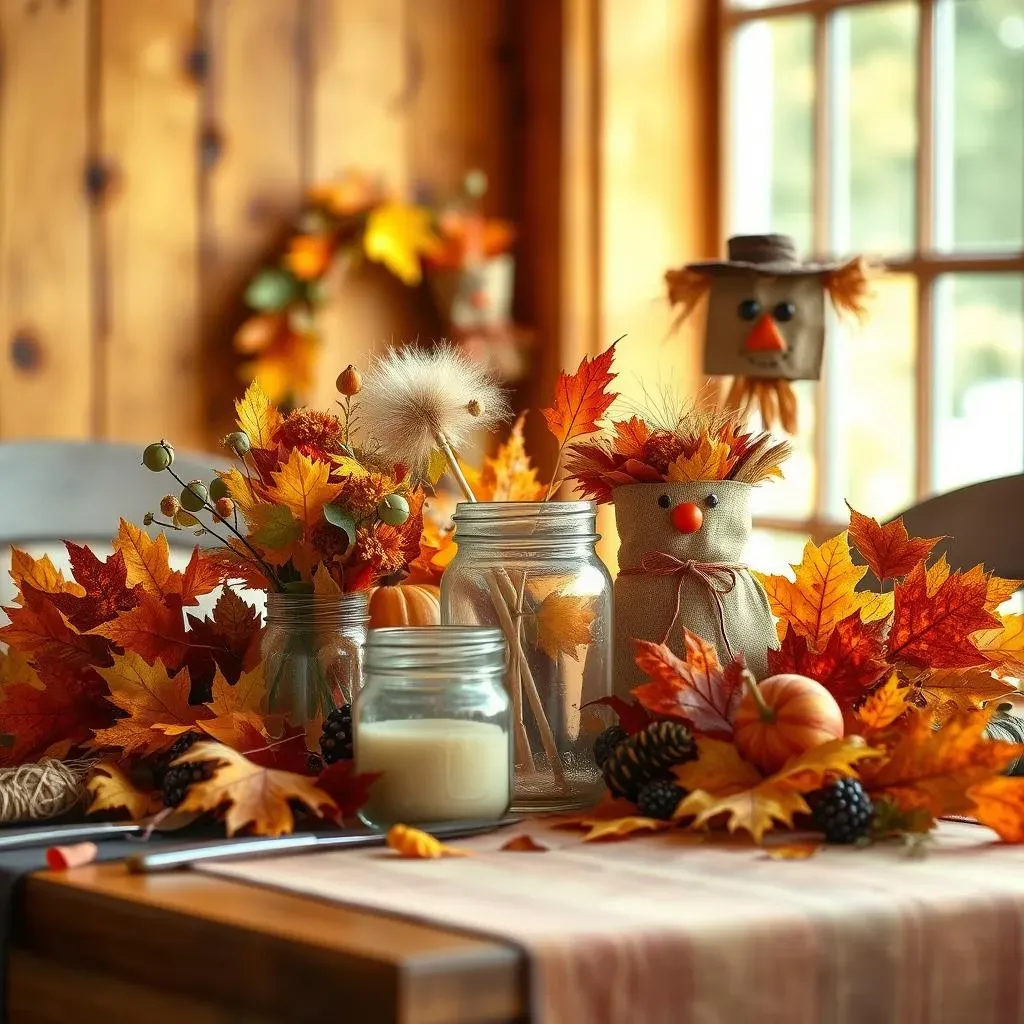
Fall Leaf Garlands
Alright, let’s move beyond turkeys for a sec and talk about some gorgeous fall decorations. How about a fall leaf garland? It’s super easy and brings a touch of nature indoors. Go on a little adventure with your 7 year olds to gather some leaves. Look for leaves that are still vibrant in color – reds, oranges, yellows, and even browns. Make sure they’re not too dry and crumbly, or they won’t hold up well. Once you’re back home, have the kids arrange the leaves in a way that they like. Then punch a small hole at the top of each leaf, use a hole puncher. Thread a string or twine through the holes, and you've got a beautiful fall garland. This is a great way to bring the beauty of the outdoors inside.
For an extra bit of fun, try laminating the leaves before you string them up. This will make them more durable and they’ll last longer. You can also add some small wooden beads or other decorations between the leaves to give it a bit more pizzazz. Hang the garland across a doorway, over a fireplace, or even along the kids’ bedroom wall. It’s a simple craft, but it makes such a big impact. And it’s a great way to get kids involved in decorating for Thanksgiving, making them feel like they’re part of the celebration.
Mason Jar Centerpieces
Next up, let’s get a little crafty with some mason jars. These are super versatile and can be turned into adorable Thanksgiving centerpieces. Start by gathering some mason jars – any size will do. Let your 7 year olds decorate them with paint, markers, or even glue and glitter. They can make them as colorful or as rustic as they like. You can wrap twine or ribbon around the tops for a more finished look. Once the jars are decorated, it’s time to fill them up. Fill them with things that make you think of Thanksgiving. Things like colorful candy corn, small pumpkins, acorns, or even some fall leaves you collected earlier.
These mason jar centerpieces are not only cute but also practical. You can use them as decorations on your Thanksgiving table or as little gifts for family members. They’re easy to make, and the kids will love showing off their creations. Plus, they add a personal touch to your Thanksgiving celebration. I love how something as simple as a jar can be turned into something so beautiful and festive. It really encourages creativity and lets the kids express their unique style. These also work great as little gifts for the guests.
Craft | Materials Needed | Skill Level |
|---|---|---|
Fall Leaf Garlands | Leaves, string, hole punch, optional: laminator | Easy |
Mason Jar Centerpieces | Mason jars, paint, markers, glue, glitter, fall fillings | Easy |
Paper Bag Scarecrows
Okay, one last decoration idea that's just too cute to pass up: paper bag scarecrows! Grab some brown paper lunch bags – the kind you'd pack a sandwich in. These will be the base of our scarecrows. Now, let the kids stuff the bags with newspaper or paper towels to give them a nice, plump shape. Once the bag is stuffed, close the top by tying it with a piece of string or ribbon. This will form the scarecrow's head. Now, for the fun part: decorating! Have the kids use markers, crayons, or paint to draw on a cute face. Get creative with the eyes, nose, and mouth. You can even add some yarn or straw for hair.
For the scarecrow’s clothes, use scraps of fabric, felt, or even construction paper. Cut out shapes for the shirt, pants, and hat, and glue them onto the paper bag. The kids can get as creative as they want with the designs and colors. I love how each scarecrow turns out completely different and unique. They can be displayed on the table, around the house, or even given as a cute gift. These scarecrows are not only adorable but also a great way to use up any leftover craft supplies you might have. And they’re a fun way to get kids excited about the fall season. It’s all about bringing that harvest feel into our homes.
Thankful Activities and Crafts for 7 Year Olds
Thankful Activities and Crafts for 7 Year Olds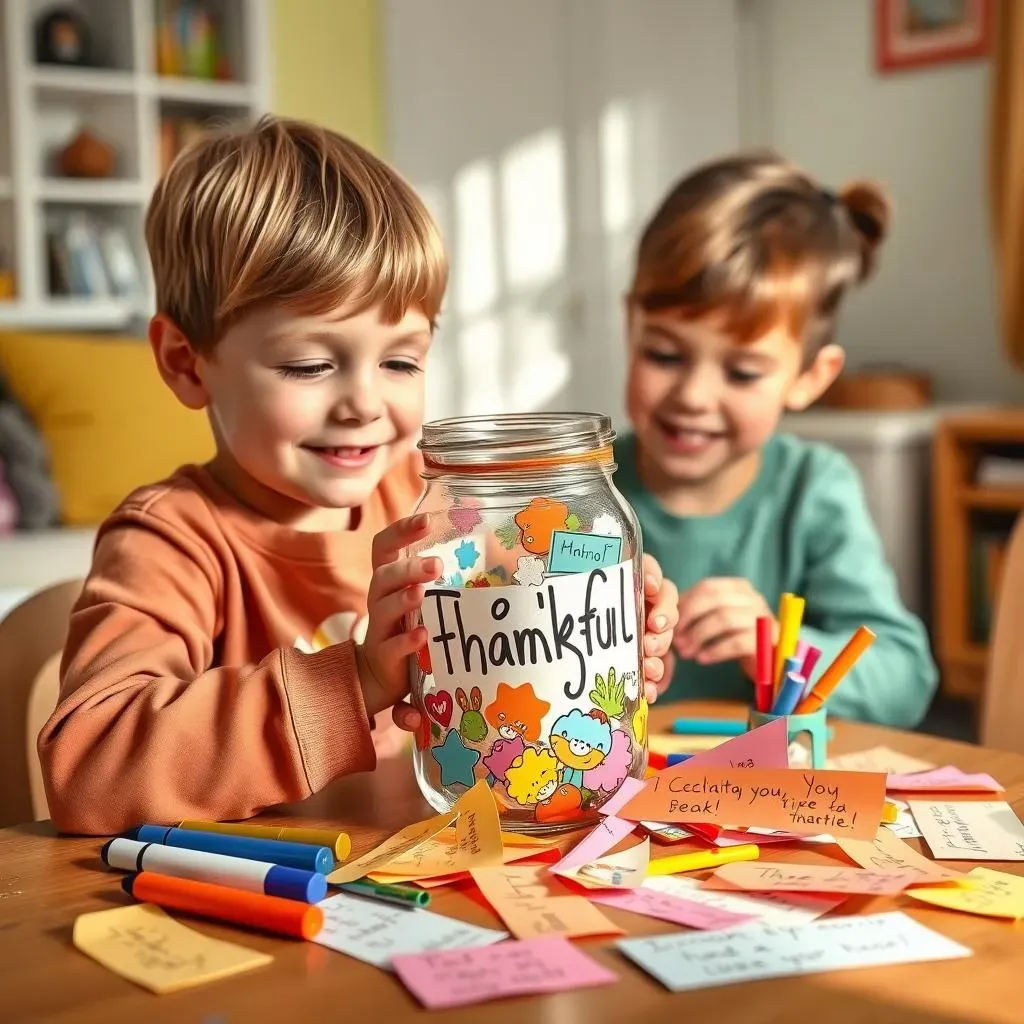
Gratitude Tree
Okay, let's switch gears and talk about being thankful. One of my favorite activities is creating a gratitude tree. It's not just a craft; it’s a way to get kids thinking about all the good things in their lives. Start by finding a small branch—you can get one from your backyard or a local park. Put it in a vase or a jar filled with sand or pebbles to keep it upright. Now, for the fun part. Have your 7 year olds cut out leaf shapes from colored paper. Let them write down one thing they’re thankful for on each leaf. It could be anything—their family, their pets, their favorite toys, or even the food they love to eat. They can decorate the leaves with markers or crayons to make them even more special.
Once the leaves are ready, have them tie or tape the leaves onto the branches. As the leaves start to fill the tree, it becomes a beautiful reminder of all the blessings they have. This isn't just a cute decoration; it’s a way to encourage kids to reflect on the positive aspects of their lives. You can even make this a daily practice during the Thanksgiving season, adding new leaves each day. It’s a simple way to introduce the concept of gratitude in a tangible way, and it’s a lovely way to start conversations about what truly matters.
Thankful Jar
Another fantastic way to practice gratitude is by creating a thankful jar. This is super simple and can become a year-round activity. Grab a mason jar or any container you have at home. Let the kids decorate it with paint, markers, or stickers to make it their own. This is where the creative freedom comes in, they can personalize it however they want. Once the jar is ready, provide small strips of paper or sticky notes. Every day, or even once a week, have the kids write down something they are thankful for and then drop it into the jar. It can be anything at all—a good day at school, a fun playdate, a delicious meal, or even something as simple as a sunny day.
Over time, the jar fills up with lots of positive memories and expressions of gratitude. On Thanksgiving Day, or whenever you feel like it, you can empty the jar and read all the notes together as a family. It’s a wonderful way to reflect on all the good things that have happened throughout the year. This activity not only encourages gratitude but also helps kids learn to appreciate the little things in life. Plus, it’s a great way to start a positive habit that can bring joy and contentment to their lives. It’s a great activity to show that being grateful is a great habit to have.
Activity | Materials Needed | Benefit |
|---|---|---|
Gratitude Tree | Branch, vase, colored paper, markers, string | Encourages reflection and gratitude |
Thankful Jar | Jar, paper strips, markers, stickers | Promotes daily appreciation |
Thanksgiving Food Crafts and Fun for 7 Year Olds
Thanksgiving Food Crafts and Fun for 7 Year Olds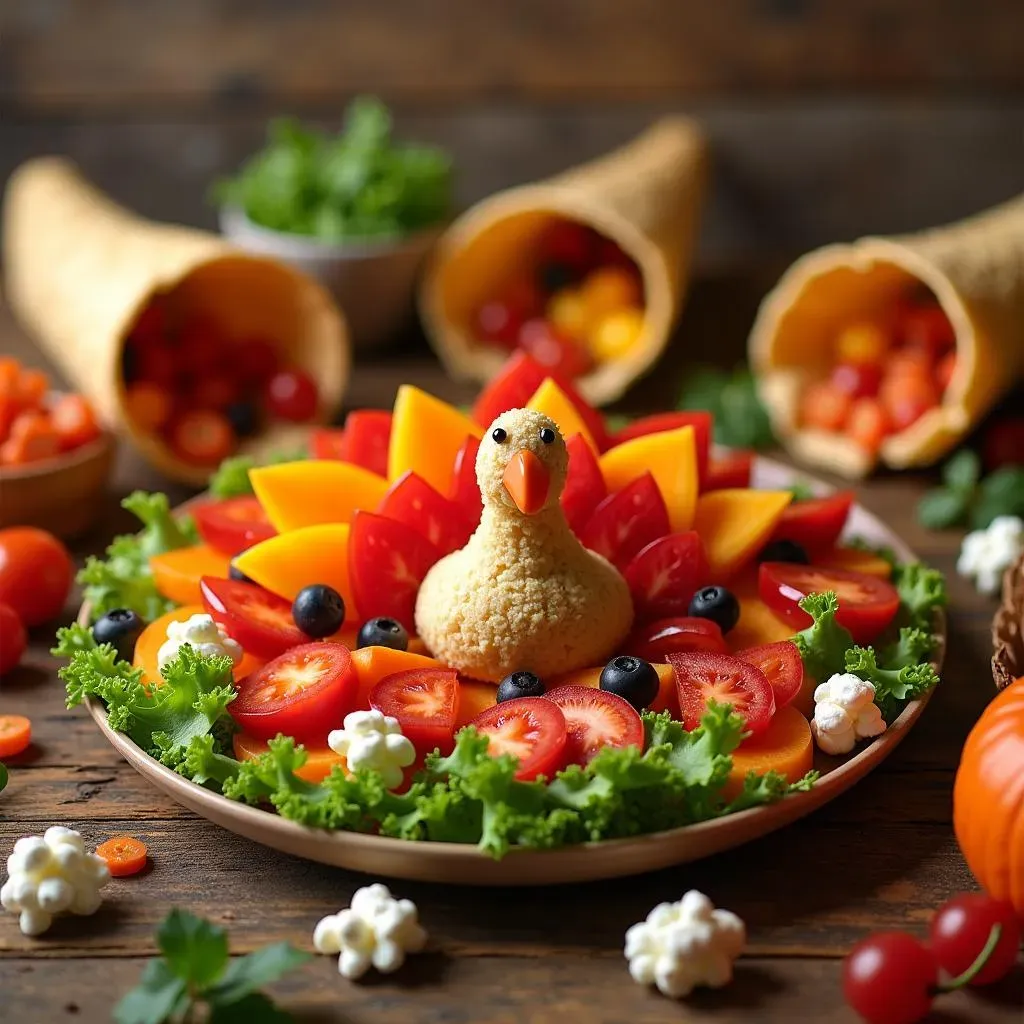
Turkey Veggie Tray
Alright, let's get into the yummy part of Thanksgiving – the food! But we're not just eating it; we’re crafting with it too! How about a turkey veggie tray? This isn’t just a healthy snack; it's a fun way to get kids excited about eating their veggies. Grab a large round plate or platter. This will be the base of your turkey. Now, for the body, you can use a small bowl filled with hummus or ranch dip. Then, it's time to get creative with the veggies. Use carrot sticks, bell pepper slices, celery sticks, and cucumber slices to create the turkey's feathers. Arrange them around the bowl, fanning them out like a turkey's tail. Use some olives for eyes and a small piece of carrot for the beak.
This veggie tray is not only visually appealing, but it's also a great way to encourage kids to eat their vegetables. They might be more inclined to try new things if they’re presented in a fun and engaging way. You can even let them help with the arranging, which will make them feel more involved in the preparation of the Thanksgiving meal. This is a perfect centerpiece for your Thanksgiving feast, and it’s a great way to add some healthy options to the table. Plus, it's so simple, even the youngest kids can help out. I love how something so healthy can be transformed into a fun and festive craft!
Edible Cornucopias
Next up, let's make some edible cornucopias, which are not only delicious but also represent the abundance of the harvest season. Start by getting some waffle cones – they'll be the base of our cornucopias. Now, for the filling, the options are endless! You can use popcorn, small candies, pretzels, dried fruits, or even a mix of nuts and seeds. Let the kids choose their favorite fillings and help them scoop the goodies into the waffle cones. You can also add some edible glue, like melted chocolate or frosting, to help the fillings stick together a little better. This makes it less messy, and more delicious.
Once the cones are filled, you can add some decorative touches. Tie a small ribbon or piece of twine around the top of the cone for a festive look. You can even add a small candy or a piece of dried fruit to the rim of the cone for extra flair. These edible cornucopias are a fun and easy craft that kids will love to make and eat. They're perfect for a Thanksgiving dessert or as a sweet treat during the holiday. Plus, they're a great way to involve kids in the kitchen and teach them about the meaning behind the cornucopia. It is a great way to add some sweetness to your Thanksgiving table.
Craft | Materials Needed | Taste Factor |
|---|---|---|
Turkey Veggie Tray | Plate, veggies, dip, olives | High |
Edible Cornucopias | Waffle cones, popcorn, candies, dried fruit, ribbon | High |